
In this tutorial,
We will learn how to create a console, WinForm or WPF project ,compile ,run and publish the project as a single standalone executable for various platforms like Linux, Windows or macOS using the command line tools provided by the .NET SDK.
This tutorial is aimed at beginners who wants to learn about .NET platform software development using command line tools provided by the dotnet SDK.
What is .NET Platform
The .NET platform is a free and open-source, managed computer software framework for Windows, Linux, and macOS operating systems developed by Microsoft by way of the .NET Foundation and is released under an MIT License. It is the successor of the .NET framework even though both of them will be available in future Windows OS releases.
One advantage of using the .NET SDK over mainstream IDE's like Visual Studio is that command line tools are faster speed and require less resources in terms of memory and processing power. The .NET SDK tools are available on multiple platforms compared to the traditional Visual Studio IDE.
One disadvantage of the .NET SDK is the lack of any Visual Design tools like WinForms Designer or WPF Designer that comes with Visual Studio.
Contents
- Installing .NET SDK CLI on Your System
- Basic .NET SDK CLI commands
- Creating a .NET Project using .NET SDK CLI
- Choosing which .NET language to use in your Project
- Compiling and Running your Project
- How to add a nuget package reference to your .NET Project
- Create a stand alone Executable using .NET SDK
- How to change the default publish directory to a user specified directory
- Creating a Single File Executable
- Creating a Single File WPF/WinForms Executable
- Creating a self contained .NET application using .NET SDK
- Creating a Framework Dependent .NET application
- Selecting Target Processor Architecture for your executable
- References
Installing .NET SDK CLI on Your System
.NET SDK is available for multiple platforms and can be downloaded from the Microsoft website.
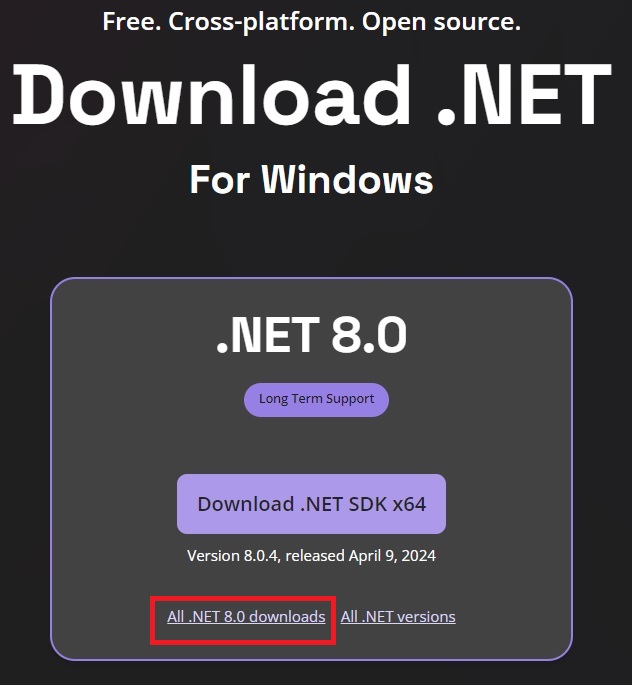
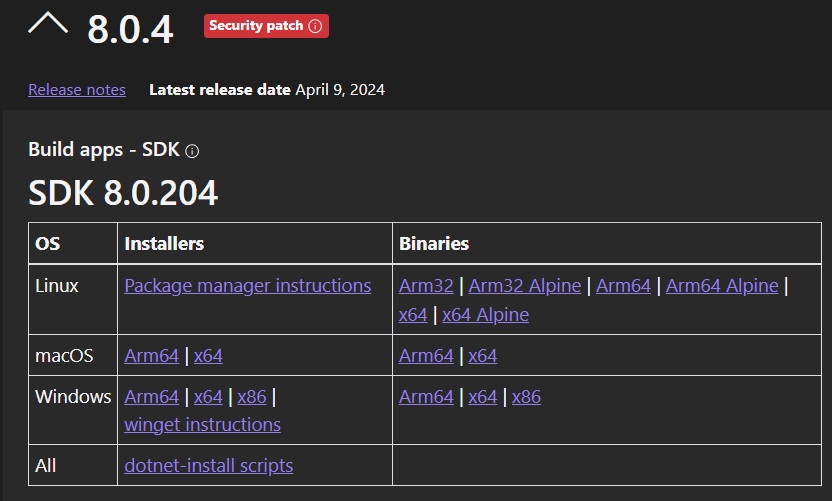
Please select the SDK required for your OS by clicking on the All.NET 8.0 downloads. Please note that at the time of writing the latest LTS version is 8.0 and may change in the future.
The SDK contains the runtime also.
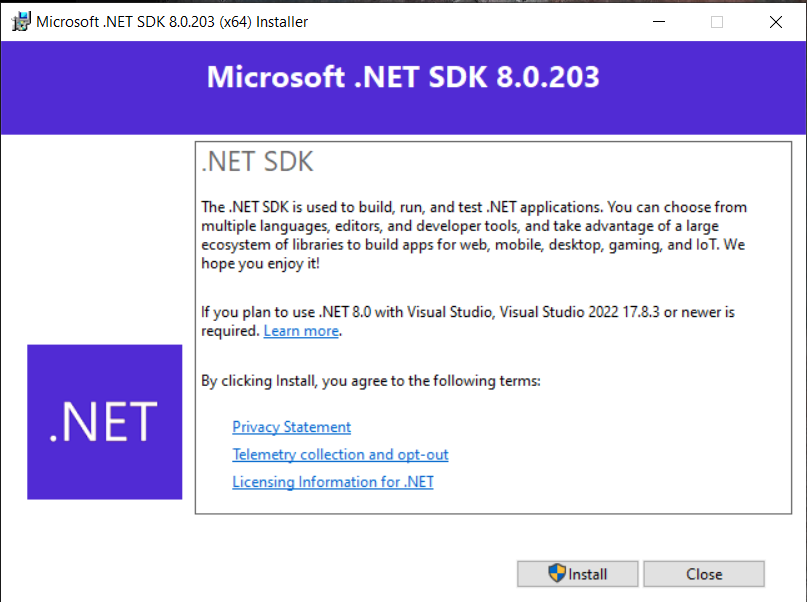
Installing .NET SDK on Windows 10/11
On Windows ,the SDK can be installed using the Windows Installer.
Installing .NET SDK on Linux
On Linux you need to use the distro specific installer like apt on Ubuntu. The package manager instructions can be found using the above link.
On Ubuntu which is the one i am using, the .NET SDK can be installed using the below command
sudo apt-get install -y dotnet-sdk-8.0
The SDK, here called as dotnet-sdk-8.0, might get updated to a newer version. So do replace it with the correct name.
When you see the -y option in the apt-get install command, it simply means you're telling the system to go ahead and say "yes" automatically to any questions it might ask during the installation process.
Basic .NET SDK commands
CLI command structure consists of the driver , the command followed by command arguments and options.
The driver is named dotnet and has two jobs
Running a framework-dependent app
Executing a command.
For a command like
dotnet publish my_app.csproj
the main parts are shown below.

Using the help command
When in doubt, You can use the built in help system to learn about the commands and options provided by the .NET SDK CLI.
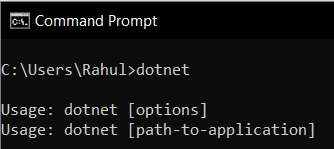
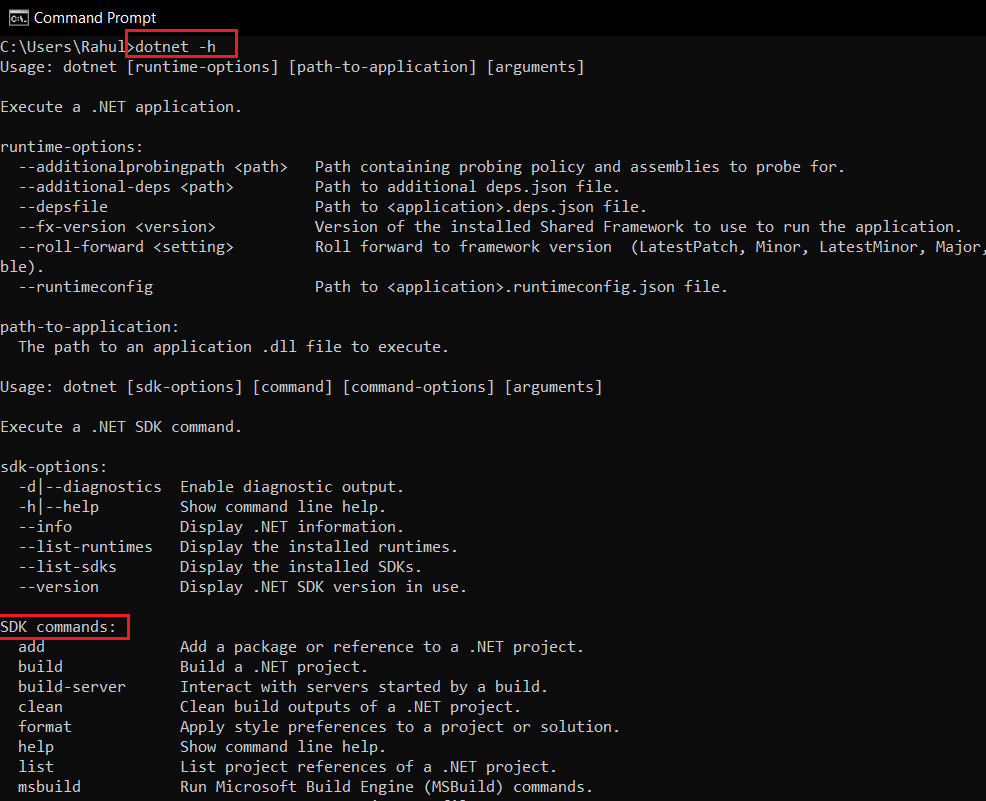
You can see all the available commands of the dotnet sdk by typing -h or --help ,(the help option)
dotnet -h
dotnet --help
To get the options available for a specific command ,you can use the
dotnet <command_name> --help
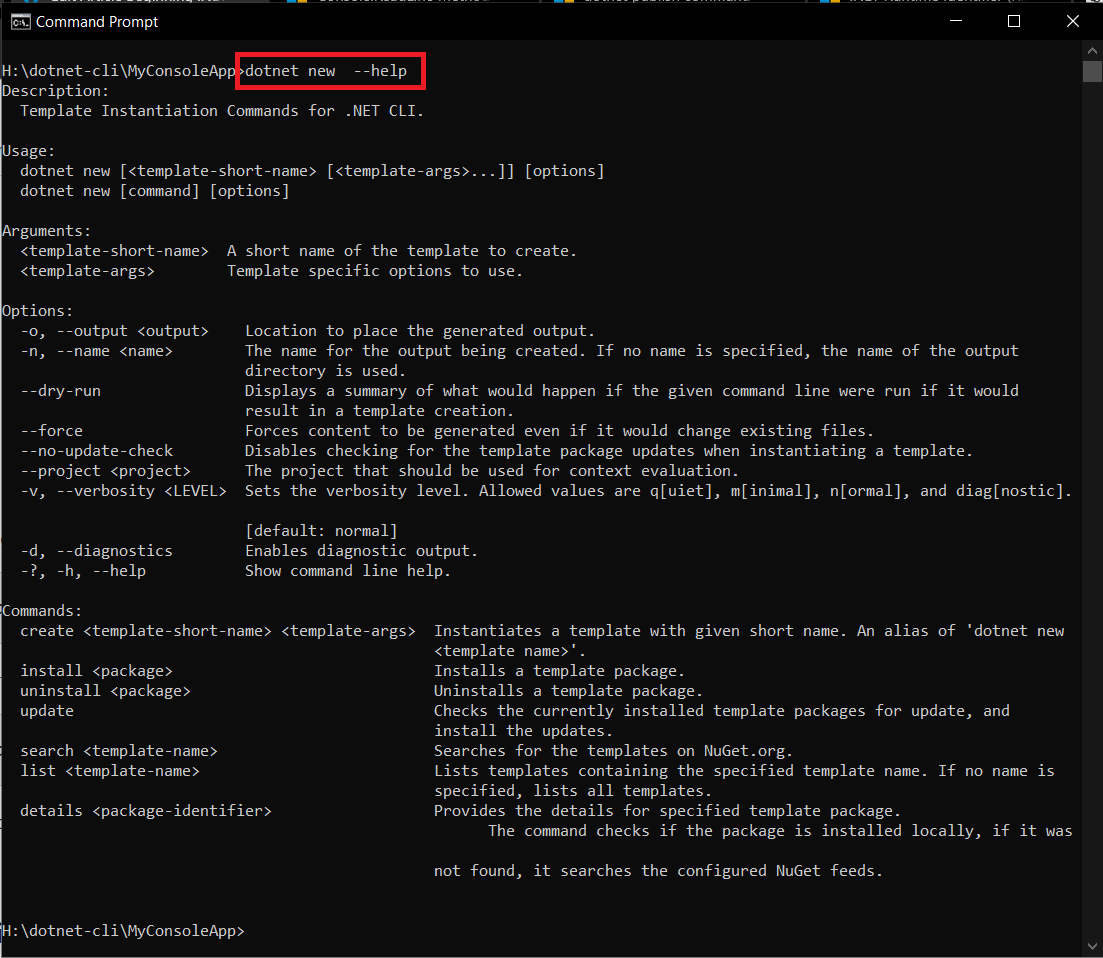
For Example ,If you want to know about the options of the dotnet new command ,you can type
dotnet new --helpand it will show the below options
Display Installed .NET runtimes
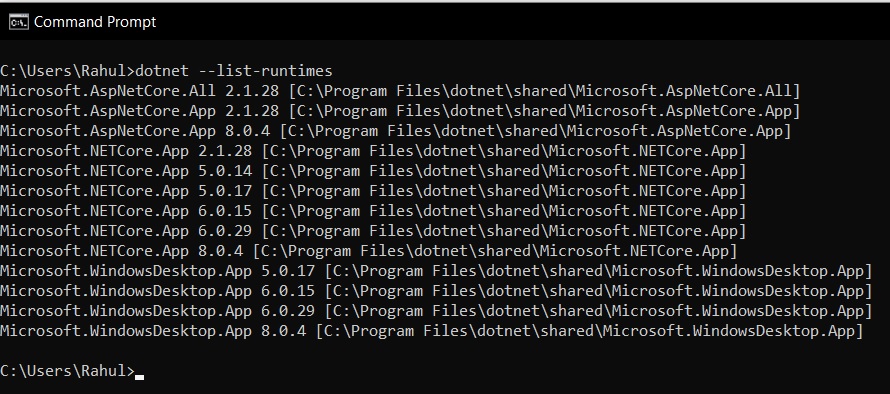
You can also view which dot net runtimes are installed on your system using the --list-runtimes option as shown below.
dotnet --list-runtimes
You can also use the --info option ,which will display all the parameters of the installed dot net SDK (.NET SDK) like runtimes, version number, system architectures etc.
dotnet --info
Creating a .NET Project using .NET SDK CLI
.NET SDK command line can create a variety of projects targeting the web and desktop environments on various platforms like Windows, Linux and macOS
You can use the dotnet new command to create different types of projects like Console, WinForms, WPF or Web.
For example
dotnet new console will create a console project that uses the C# language on your current directory. C# is the default language .For using other languages like VB.NET or F# you have to explicitly specify the language while creating the project.
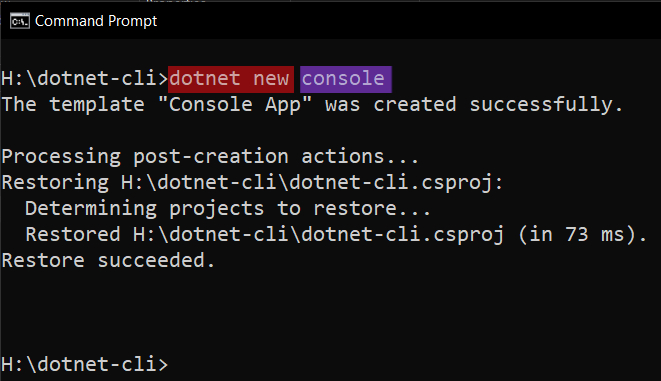
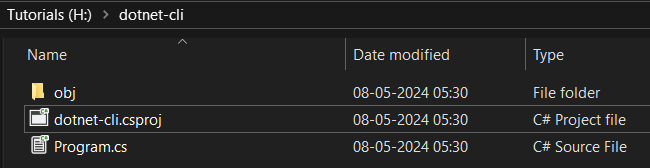
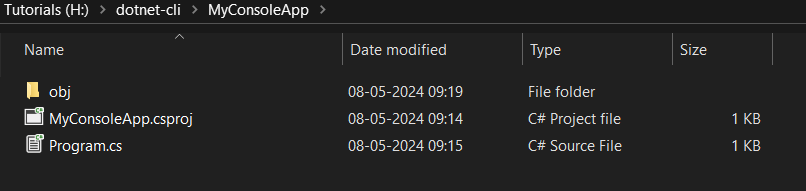
inside your directory ,you can find a Program.cs file along with a .csproj file as shown below.
You can specify an output directory using the -o flag.
All your files will be inside the "output_directory_name" and your csproj file be named "output_directory_name.csproj"
dotnet new console -o output_directory_nameFor example
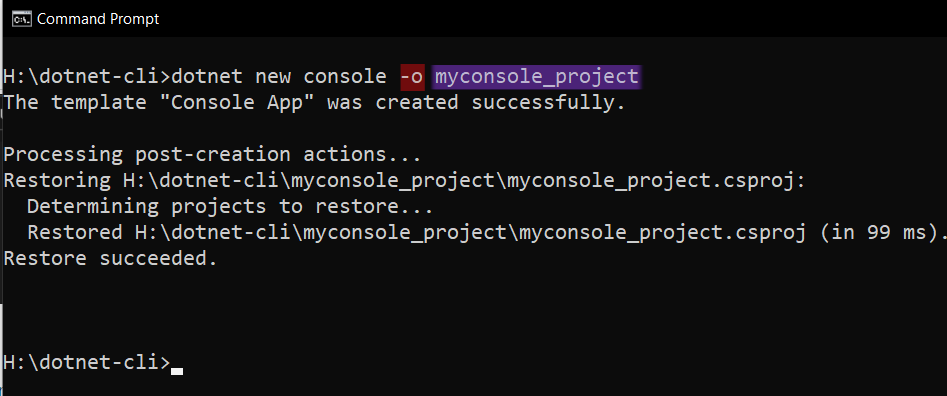
Here the name of the output directory is myconsole_project
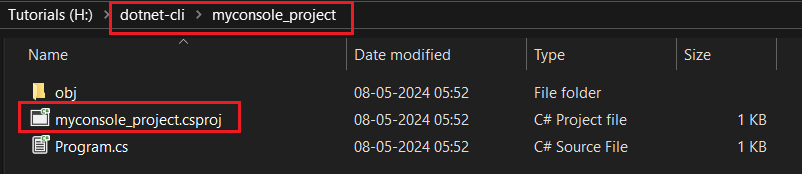
You can see that csproj file is also named similarly.( myconsole_project.csproj )
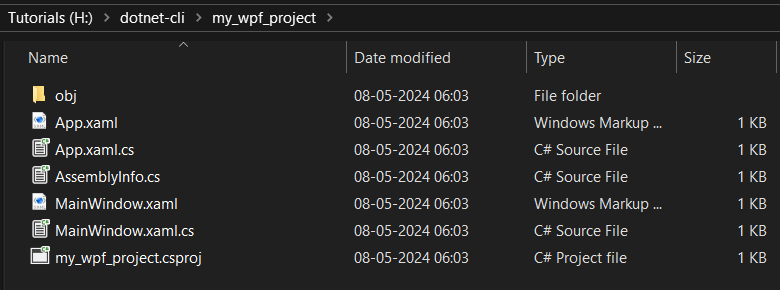
You can also create a WPF or WinForms projects using the dotnet new command as shown below.
Creating a WPF Project using .NET SDK CLI
dotnet new wpf -o output_directory_name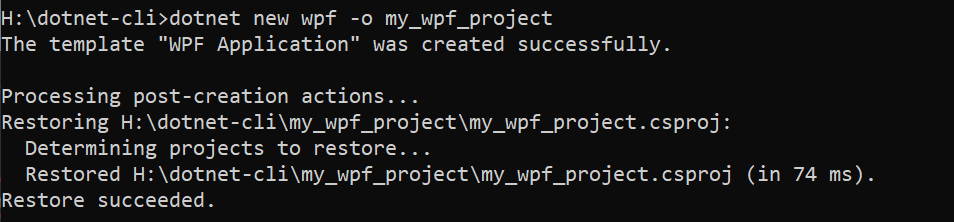
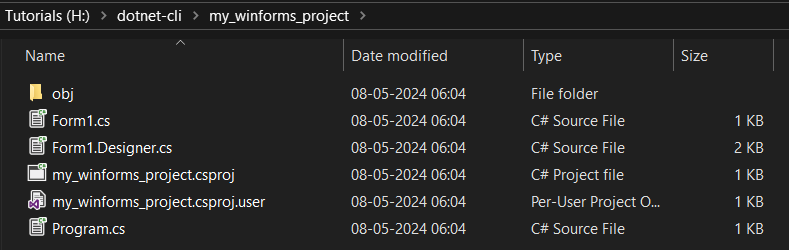
Creating a WinForms Project using .NET SDK CLI
dotnet new winforms -o output_directory_name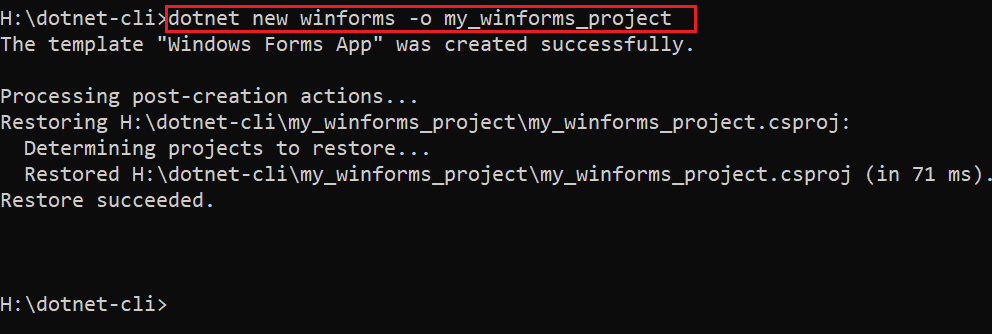
WinForms and WPF are not cross platform and are only supported on Windows Platforms. It is actually better to do those projects using the IDE like Visual Studio due to the presence of a Visual Forms Designer.
Selecting the language for your .NET Project
Throughout all our past projects, we've primarily utilized the C# language. It's important to note that the .NET platform also caters to other languages like Visual Basic.NET and F#. Nevertheless, C# stands as the default choice while creating a new project, unless explicitly stated.
You can change the language you want to use by specifying the --language option while creating the project.
For example ,if we need to use the F# language in our console project you can use the following command
dotnet new console --language F#
If we need to use Visualbasic.NET in our .NET Project
dotnet new console --language vb
If no --language option is given ,the language will be C#.
Compiling and Running your Project using .NET SDK
Now we will compile our .NET project and run it using the .NET SDK command line tools.
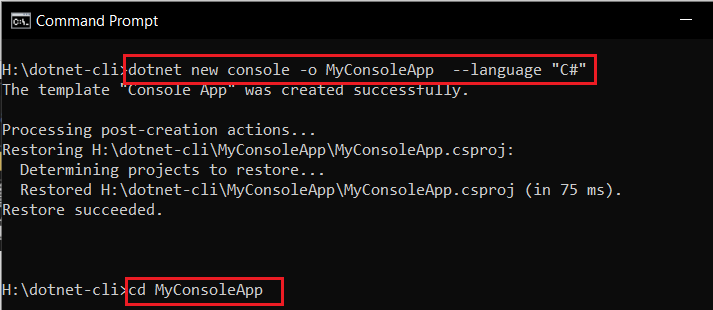
First we create a new project called MyConsoleApp using the dotnet new command as shown below
dotnet new console -o MyConsoleApp --language C#which will create the following directory structure
Now go to the directory MyConsoleApp.
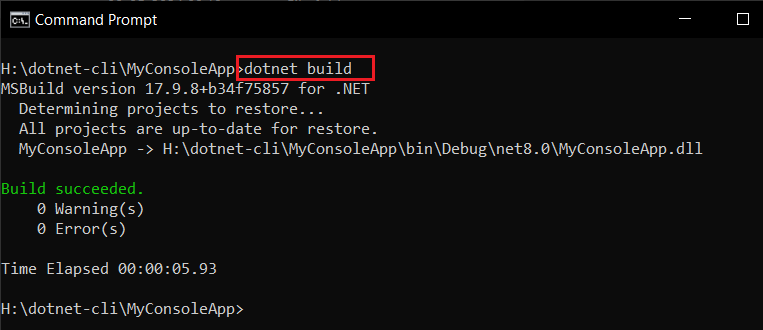
From inside the directory you can issue the build command ,that will compile your source code and generate the executable.
dotnet build
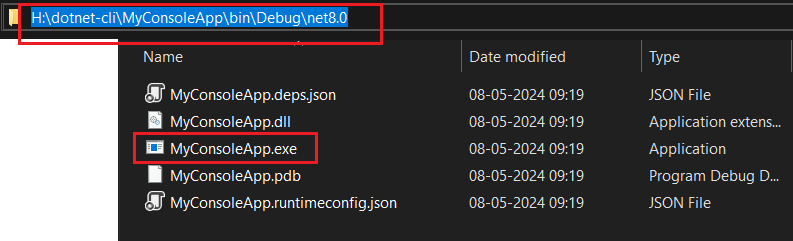
You can find the executable inside the MyConsoleApp\bin\Debug\net8.0 directory
You can now run your executable by issuing the run command.
dotnet run
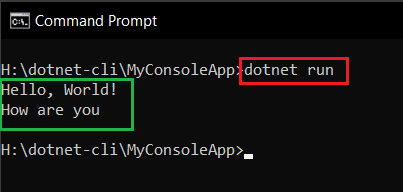
Here in the above figure you can see the output of the hello world program.
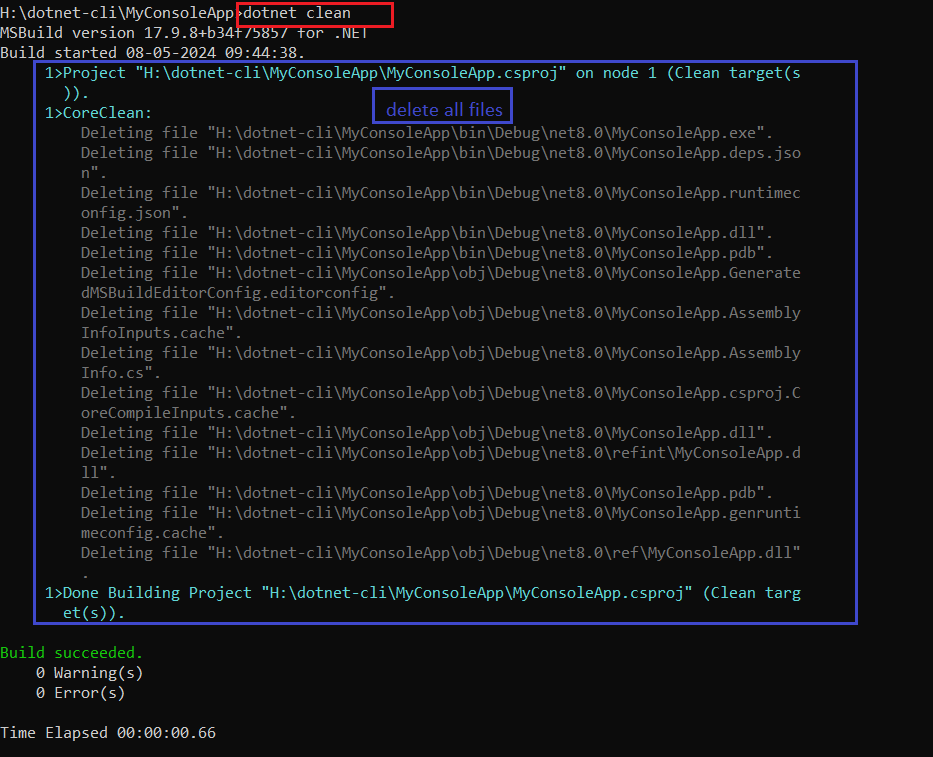
Rebuilding the Project
You can recompile the entire project by using clean and build commands. A normal build command will only check what has changed between each compile cycles and will only compile the changes made.
dotnet clean
which will delete all the compiled files and other compiler generated artifacts.
dotnet build
.and the build will do a complete rebuild.
How to add a NuGet package reference to your .NET project
Here, we will learn how to add references to required libraries using dotnet add package command from .NET SDK CLI.
References in the context of .NET development are dependencies that your project relies on to function properly. These dependencies can take the form of
- Assemblies ->Compiled .NET code packaged into DLL files. These assemblies contain types (classes, interfaces,.) that your project needs to use.
- NuGet Packages-> Third-party libraries or frameworks available from the NuGet package repository
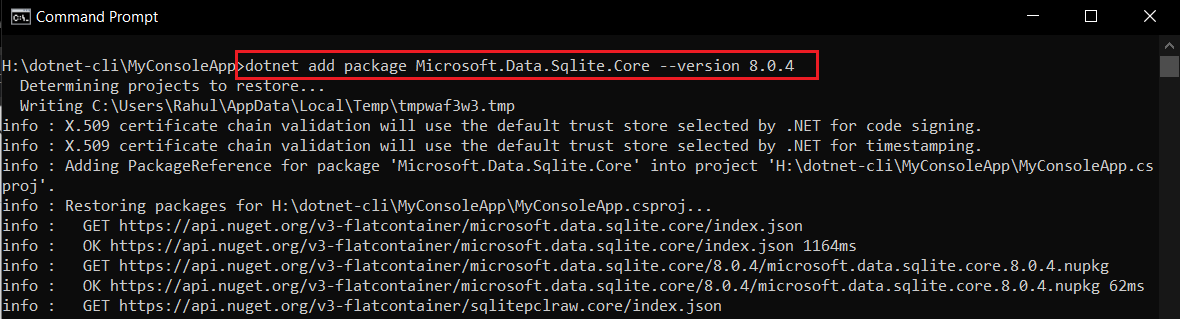
dotnet add package is a command provided by the .NET CLI (Command Line Interface) to add NuGet packages to your .NET projects. The syntax of the the command is the following
dotnet add package <package-name>When you run the above command with the appropriate <package name> ,the .NET CLI contacts the NuGet package source (usually it's nuget.org) and downloads the specified package along with its dependencies. It then updates your project file (such as a .csproj file) to include references to the newly added packages.
Easiest way to know the package name of the required library is to go to nuget.org and search for your package.
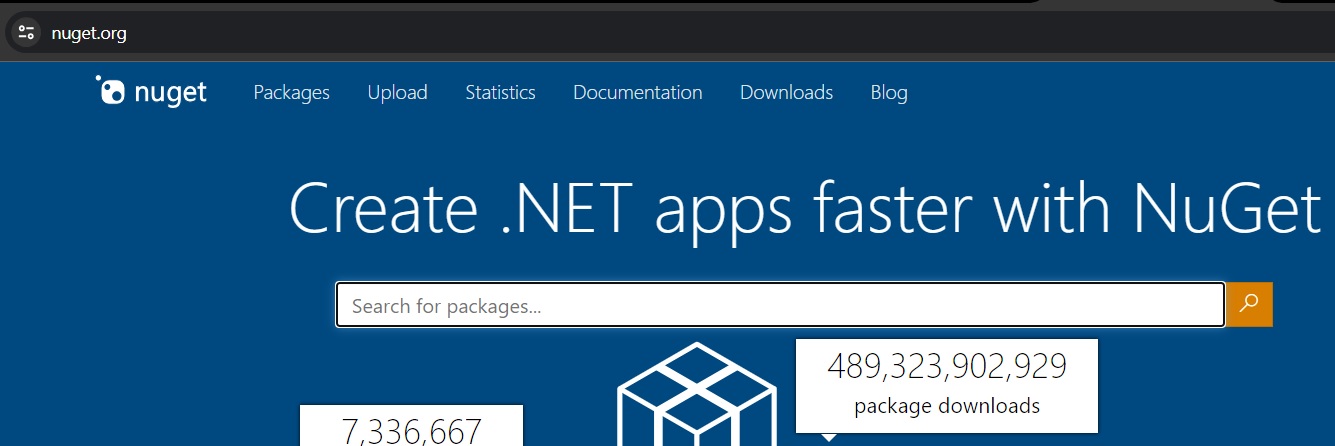
For example ,if you want to install the sqlite library NuGet package and its required references using .NET CLI add package command. You can go to nuget.org and search for the SQLite NuGet package.

Now here we want the 8.04 version instead of the preview version. You can click on the required version and the appropriate package name along with relevant command can be found under the .NET CLI tab as shown in the above image. You can then just copy the command and use it in your project.
After this your MyConsoleApp.csproj file will be updated with the required references
<Project Sdk="Microsoft.NET.Sdk">
 <PropertyGroup>
   <OutputType>Exe</OutputType>
   <TargetFramework>net8.0</TargetFramework>
   <ImplicitUsings>enable</ImplicitUsings>
   <Nullable>enable</Nullable>
 </PropertyGroup>
 <ItemGroup>
   <PackageReference Include="Microsoft.Data.Sqlite.Core" Version="8.0.4" />
 </ItemGroup>
</Project>
Now you can use the classes and libraries provided by the package in your code.
How to list all the NuGet packages used in a Project
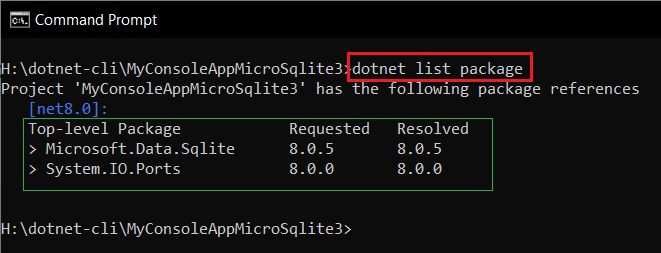
You can use the dotnet list package command to list all the NuGet package references for a specific project or a solution. You first need to build the project in order to have the assets needed for this command to process.
dotnet list package
Here is an example of a project using System.IO.Ports and Sqlite3 packages.
How to remove Specific NuGet packages from a Project
You can also remove specific NuGet packages from your project using the dotnet remove package <package_name> command as shown below.
dotnet remove package <package_name> Here we are going to remove the System.IO.Ports Package from our Project but will keep the Microsoft.Data.Sqlite package.
dotnet remove package System.IO.Ports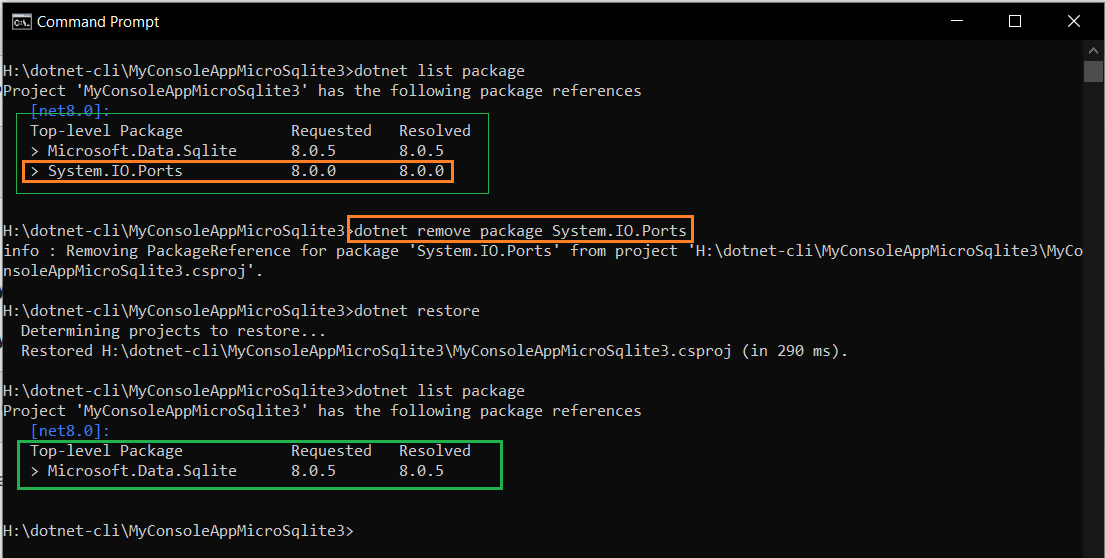
Add a reference to Local .NET assembly
You can also add reference to a local .NET assembly available on your file system using the below command.
dotnet add reference /path/to/MyLibrary.dllhere /path/to/MyLibrary.dll is the path to your local assembly file.
Create an Executable using dotnet publish Command
You can use the dotnet publish command to create an executable (.exe) along with its required dependencies(.dll) in a single folder, so the program can be deployed on an another machine.
The basic usage of the command is
dotnet publish
this will create an executable along with its dependencies in the following folder
<Name_of_Project_Folder>\bin\Release\net8.0\publishNow we will create a simple project with dependencies and create an executable from that project. The project will be a simple console project with references to sqlite library and System.IO.Ports namespace.
dotnet new console -n MyConsoleAppDepend then we add the sqlite and ports packages from nuget.org using add package command .
dotnet add package System.Data.SQLite.Core --version 1.0.118
dotnet add package System.IO.Ports --version 9.0.0-preview.3.24172.9
Now you can publish this project using
dotnet publish
this will create an executable, required dll files and runtimes inside the directory
MyConsoleAppDepend\bin\Release\net8.0\publishdotnet publish compiles the application, reads through its dependencies specified in the project file, and publishes the resulting set of files to a directory (\publish).
the output includes the following
Intermediate Language (IL) code in an assembly with a dll extension here MyConsoleAppDepend.dll.
A .deps.json file that includes all of the dependencies of the project.
A .runtimeconfig.json file that specifies the shared runtime that the application expects, as well as other configuration options for the runtime (for example, garbage collection type).
The application's dependencies, which are copied from the NuGet cache into the output folder.

The corresponding .dll file (MyConsoleAppDepend.dll) with the same name as the executable (MyConsoleAppDepend.exe) is referred to as the "host assembly" or "framework-dependent deployment (FDD) assembly."It contains the Main method or entry point for your application. When you execute the .exe file ((MyConsoleAppDepend.exe)), it internally loads and executes this .dll (MyConsoleAppDepend.dll) file.
The .exe file serves as the entry point for your application. When you execute the .exe file, it's responsible for starting the .NET runtime and loading the necessary dependencies, including the main .dll file(s) that contain your application code.The .dll file(s) contain the actual code and logic of your application. They are dynamically loaded by the .NET runtime when the .exe file is executed. These .dll files can include your application's business logic, libraries, and any other code components. While the .dll file(s) contain the actual implementation of your application, the .exe file orchestrates the startup process, loads dependencies, and kicks off the execution of your application code
There is also a runtime directory which contains the runtimes needed for the installed libraries and associated architectures.
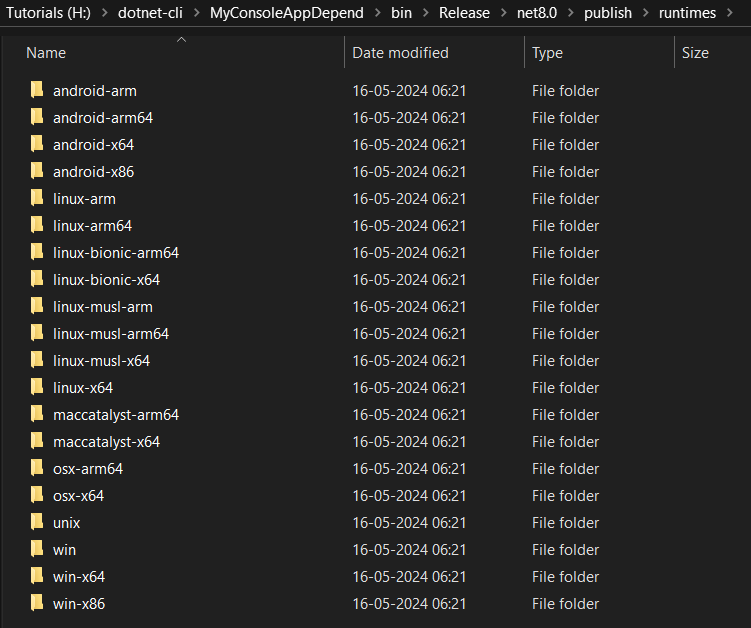
As you can see from here, we have runtimes for all the supported architectures. You can trim that to required architectures by providing the required command options.
For extremely simple projects without any dependencies the publish output may look different as shown below. The below project has no dependencies
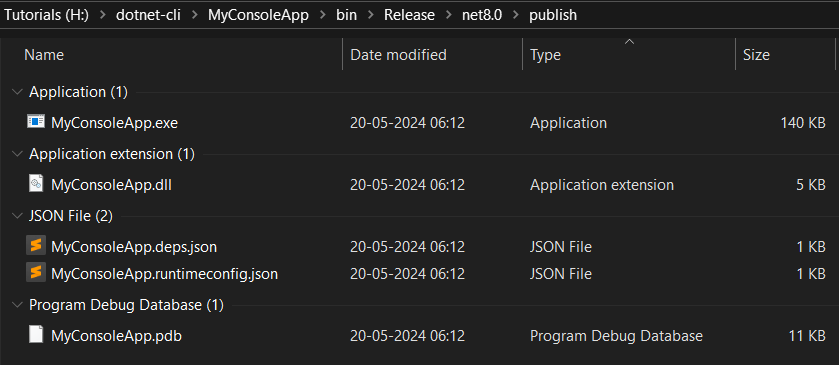
As you can see the publish folder lacks the runtime directory and other dll's.
How to change the default publish directory in .NET SDK
You can change the default publish folder to the one you want by giving the -o option
dotnet publish -o <output_directory_path>
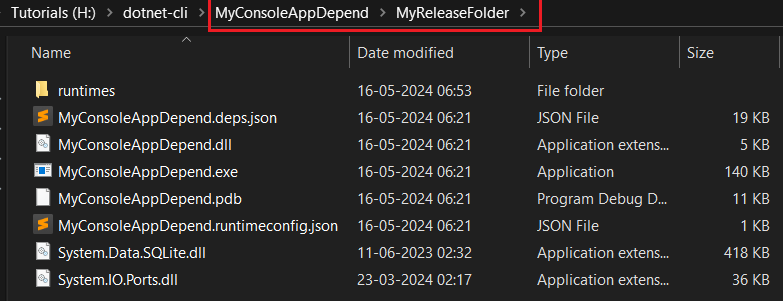
dotnet publish -o MyReleaseFolder
This will create a user generated folder called MyReleaseFolder inside your project directory as shown below and put all the executable and dll files inside it as shown below
The dotnet publish command calls MSBuild, which invokes the Publish target.Any parameters passed to dotnet publish are passed to MSBuild.
The -c and -o parameters map to MSBuild's Configuration and PublishDir properties, respectively.
The dotnet publish command accepts MSBuild options, such as -p for setting properties and -l to define a logger
Creating a Single File Executable using .NET SDK CLI
As you can see in the above example we have a lot of files along with the executable, You can create single file executable by using the option -p:PublishSingleFile=true when using the dotnet publish command. Here dotnet publish is invoking the -p option of the MS build tool to create a single file executable.
dotnet publish -p:PublishSingleFile=trueYou can find the executable in the directory
\bin\Release\net8.0\win-x64\publish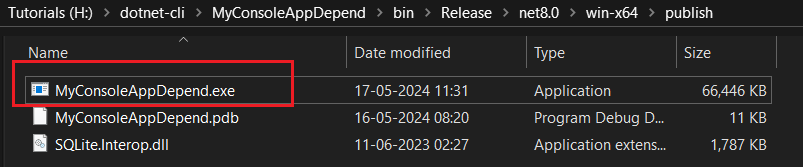
Here MyConsoleAppDepend.pdb is for debugging and can be safely disregarded.
The size of the executable is around 66.5 Mega Bytes that is because this is a fully self contained application and do not depend upon the .NET runtime included in the PC.
Now here we still have the Sqlite.Interop.dll file ,you can include the .dll inside your executable using the option -p:IncludeNativeLibrariesForSelfExtract=true
So the command will be
dotnet publish -p:PublishSingleFile=true -p:IncludeNativeLibrariesForSelfExtract=true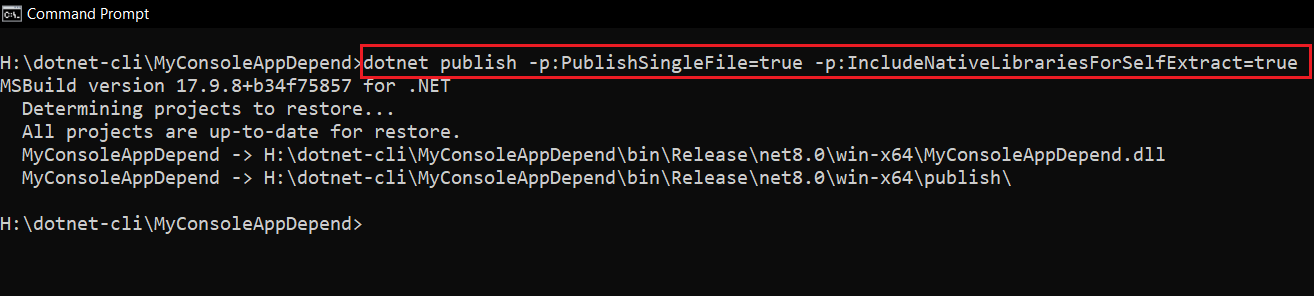
Now you will have the following files in your release folder.

You can see that size of the executable have increased.
In this case , all the dependencies required to run your application are also included in the single executable file. This includes .NET runtime libraries, any third-party libraries your application depends on, and native libraries if needed.
When you run the single executable file, it is extracted to a temporary directory on the user's machine. This extraction process unpacks all the contents of the executable file, including your application code and its dependencies.
Once the extraction is complete, your application runs from the temporary directory just like any other application. Users don't need to worry about installing the .NET runtime or managing dependencies separately. This simplifies deployment and distribution of .NET applications, especially in scenarios where you want to distribute your application as a standalone executable without requiring users to install the .NET runtime or manage dependencies manually.
Creating a Single File exe for WPF /WinForms Projects
If you just use the
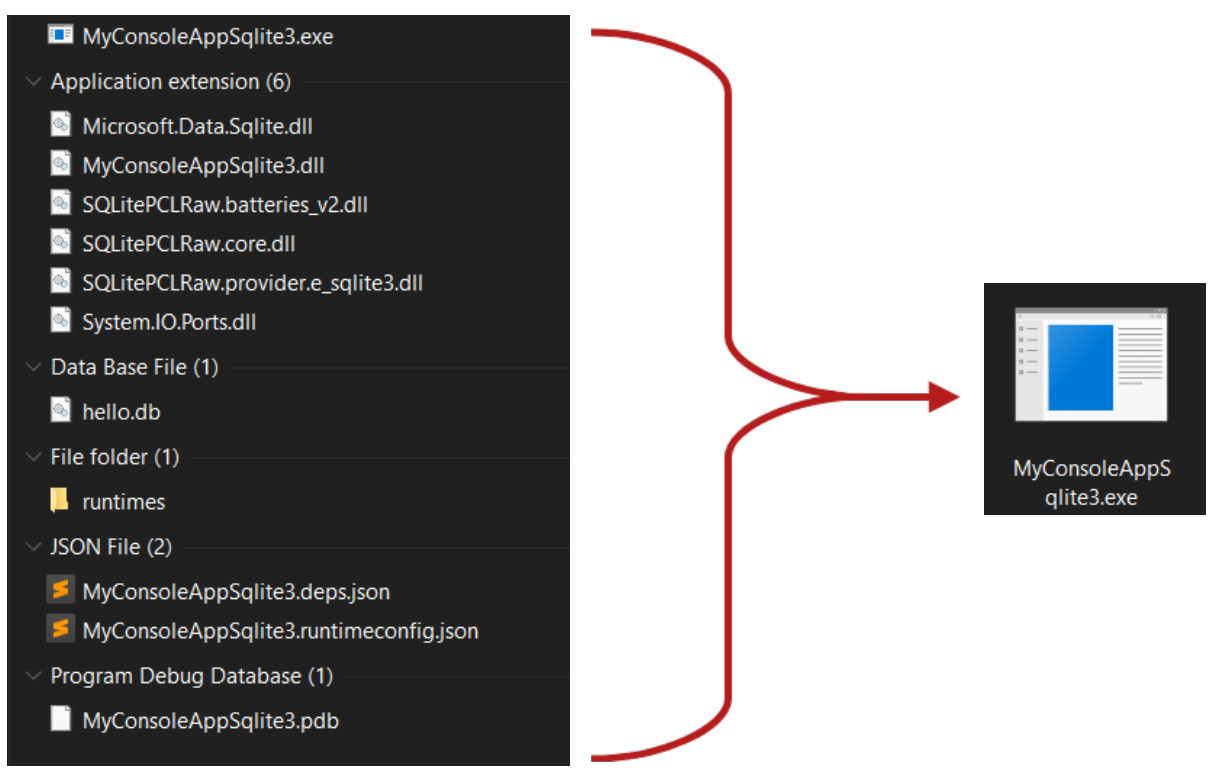
dotnet publish -p:PublishSingleFile=truesome dlls will not be included in the resulting .exe as shown below.
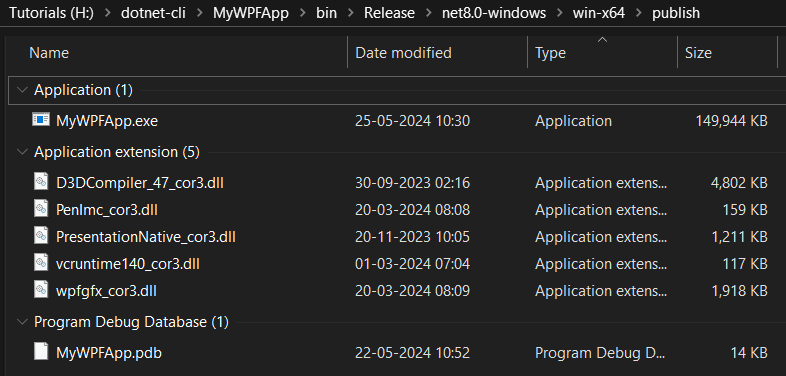
use -p:IncludeNativeLibrariesForSelfExtract=true option to combine them into a single exe.
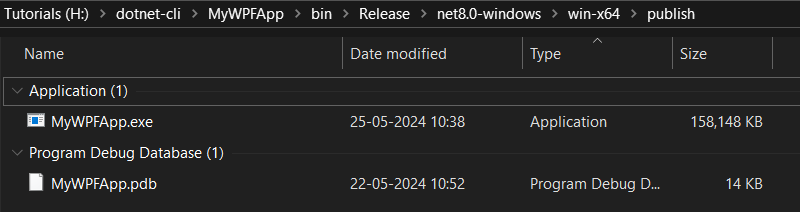
You have to use the full command
dotnet publish -p:PublishSingleFile=true -p:IncludeNativeLibrariesForSelfExtract=trueto create a single file WPF/WinForms executable as shown below
Creating a self contained .NET application using .NET SDK CLI
A self-contained or framework independent dotnet (.NET) application is an application that includes all of its dependencies, including the .NET runtime, as part of the application package. This means that the application can be deployed and run on a target system without requiring the .NET runtime to be pre-installed on that system.
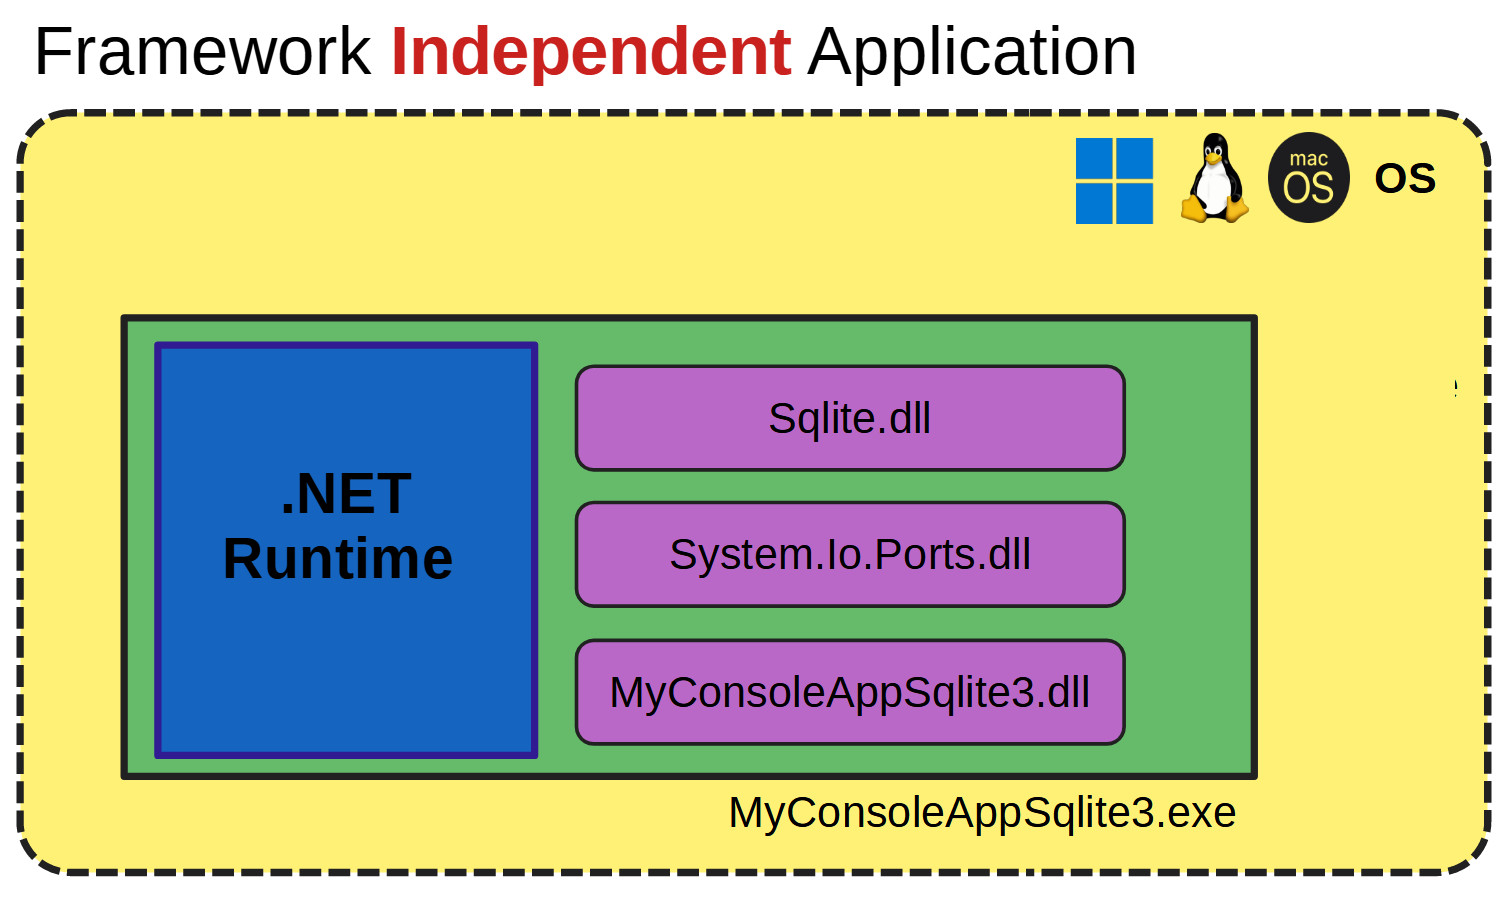
They are often used for distributing standalone executables or deploying applications to environments where you have limited control over the runtime environment.
You can create a single file self-contained .NET application using the below command.
dotnet publish -p:PublishSingleFile=true -p:IncludeNativeLibrariesForSelfExtract=trueor
dotnet publish -p:PublishSingleFile=true -p:IncludeNativeLibrariesForSelfExtract=true -p:selfcontained=trueHere we are using the option -p:selfcontained=true to explicitly say that the .NET executable should be self contained.
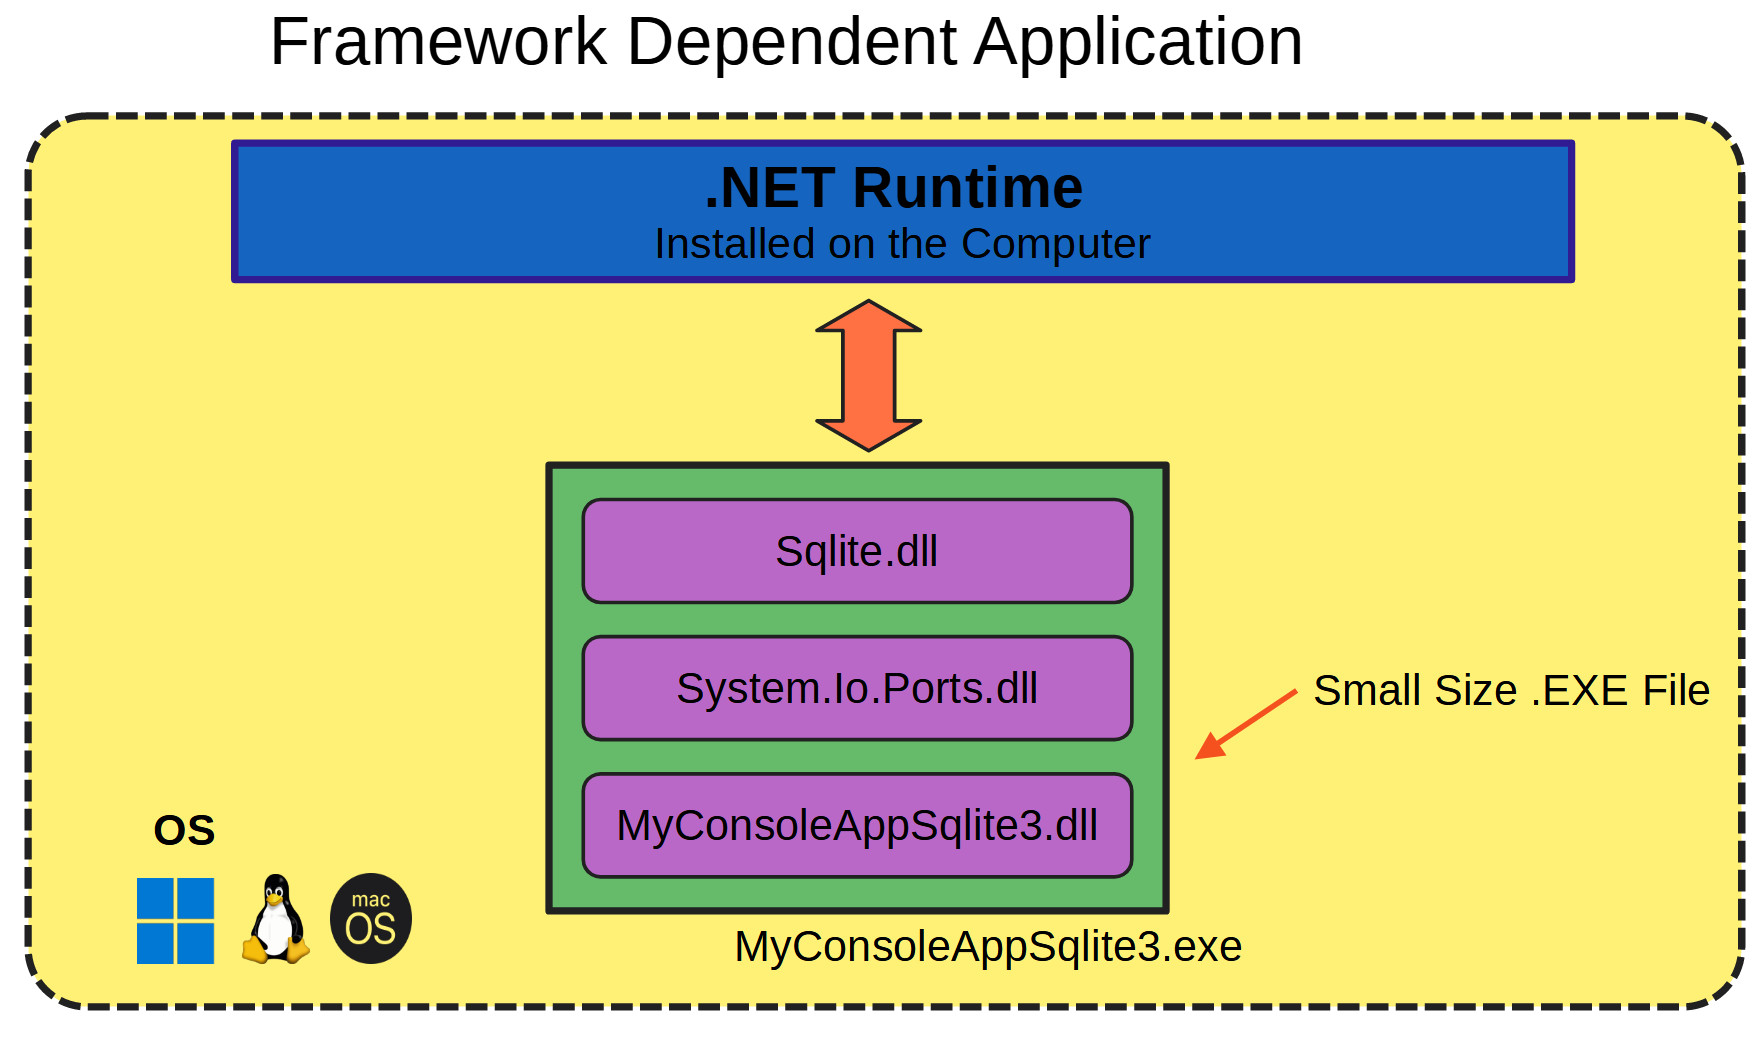
Creating a Framework Dependent .NET application using .NET SDK CLI
The opposite of a self-contained application in the context of .NET would be a framework-dependent application. In a framework-dependent deployment, the application relies on the presence of the .NET runtime on the target system. It does not include the .NET runtime or its components in the application package. Instead, it relies on the user or system administrator to have installed the required version of the .NET runtime.
You can create a framework dependent application by saying -p:selfcontained=false
Here is the full command for creating a single file framework dependent .NET application using dotnet publish.
dotnet publish -p:PublishSingleFile=true -p:IncludeNativeLibrariesForSelfExtract=true -p:selfcontained=false same effect can be achieved by using dotnet publish command but it will result in multifile executable.
A self-contained .NET application tend to be generally bigger than the framework dependent app as you can see from the below image.

Here the exe file created using self contained option is around 68.2MB while the Framework dependent .NET app has a size of 2.4MB.
Framework-dependent applications are typically smaller in size compared to self-contained applications since they don't include the entire .NET runtime. However, they require additional steps for deployment, such as ensuring the correct version of the .NET runtime is installed on the target system.
Selecting Target Processor Architecture using .NET SDK CLI
The .NET platform is a multiplatform framework that can run on operating systems like Windows ,Linux and Mac OS and can target both 32 and 64 bit x86 architecture as well as the ARM processors like the one found in Raspberry PI computers.
.NET platform uses RID's to specify the architecture on which the app should run.RID is short for runtime identifier. RID values are used to identify target platforms where the application runs. They're used by .NET packages to represent platform-specific assets in NuGet packages. The following values are examples of commonly used RIDs:
win-x64 - 64 bit Windows
win-x86 - 32 bit Windows
osx-x64 - Mac OS
linux-x64 - 64 bit Linux
linux-arm - 32 bit linux running on Raspberry Pi Model 2+
Full list of RID's can be found on Microsoft site .
To select a specific architecture using the .NET CLI (Command Line Interface), you can use the -r or --runtime option followed by the appropriate Runtime Identifier (RID) for the target architecture.
For eg for 64 bit windows
dotnet publish -r win-x64
or
dotnet publish --runtime win-x64
In our case,
we can create a single file self contained executable targeting the 64 bit windows platform using the below command.
dotnet publish -p:PublishSingleFile=true -p:IncludeNativeLibrariesForSelfExtract=true -r win-x64we can create a single file self contained executable targeting the 32 bit windows platform using the below command.
dotnet publish -p:PublishSingleFile=true -p:IncludeNativeLibrariesForSelfExtract=true -r win-x86we can create a single file self contained executable targeting the 64 bit Linux platform using the below command.
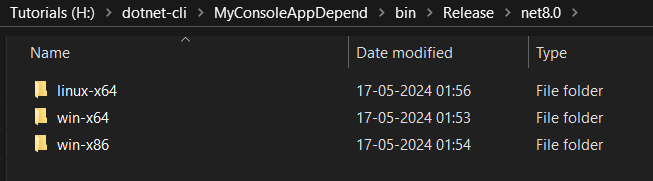
dotnet publish -p:PublishSingleFile=true -p:IncludeNativeLibrariesForSelfExtract=true -r linux-x64
This will create separate folders inside your .NET8.0 as shown below, containing all your executables.
References
- Log in to post comments