
In this tutorial,
We will learn How to install a Drupal 10 CMS on a Windows 10 PC using XAMPP web server.
Drupal 7 is reaching EOL by 5 January 2025 and people are thinking about migrating to a new version of Drupal CMS.
You can migrate to Drupal 9 but CKEditor 4 is also reaching EOL so it would be better to migrate directly to Drupal 10 as it comes with a lot of options including the new CKEditor 5 .

This tutorial will allow the user to test drive the new Drupal 10 CMS on his/her PC before committing to the server.
Contents
- Installing and configuring XAMPP on Windows 10
- Creating a Database to store the Drupal 10 data
- Configuring the PHP.ini file
- Configuring the MySQL my.ini file
- Installing Drupal-10 on Windows 10
- PHP extensions are not enabled on the Windows Error Message
- Connecting the Database with the Drupal 10 Installation
Installing and configuring XAMPP on Windows 10
XAMPP is a free opensource web server solution stack managed by Apache Friends.
You can download the XAMPP stack for Windows from their website.
Install the XAMPP stack on the default location of
C:\xampp
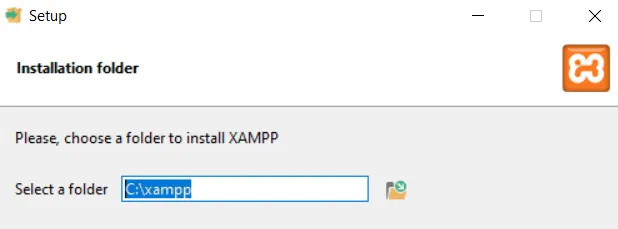
It will take some time for the XAMPP server stack to install.
After which you can start the control panel which is used to start and stop the Apache webserver and the MySQL database.
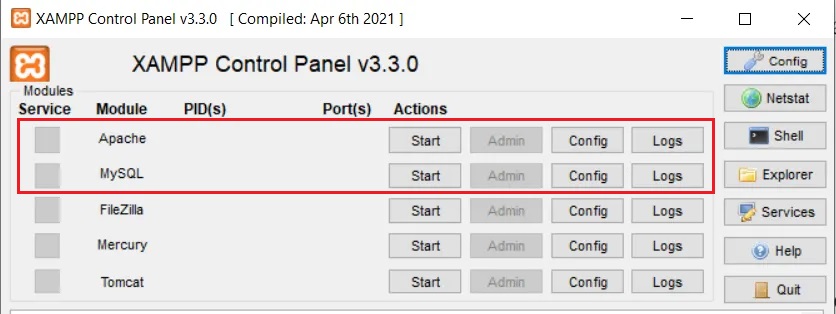
Start Apache Webserver and MySQL DBMS using the "Start" button
You can go to the dashboard by clicking "Admin" near the Apache or by going to
http://localhost/dashboard/
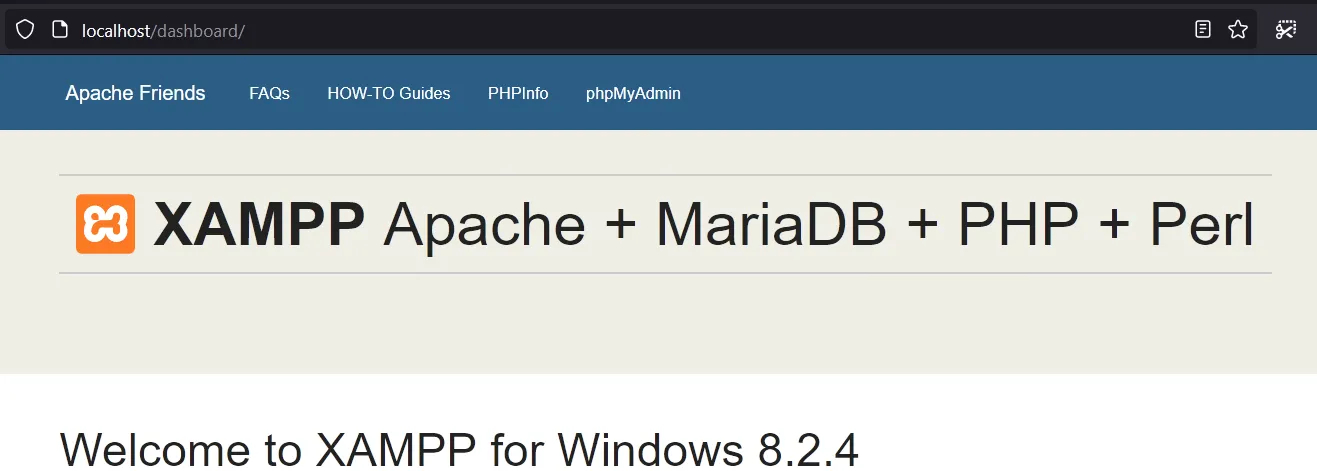
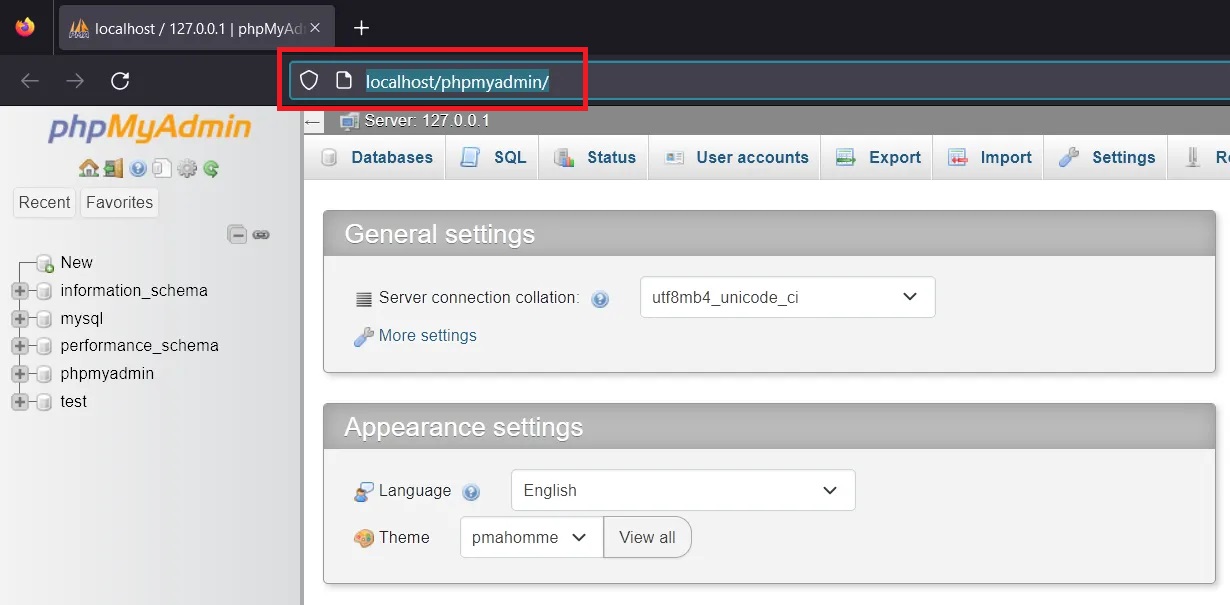
You can go to the phpmyadmin by clicking "Admin" near the MySQL
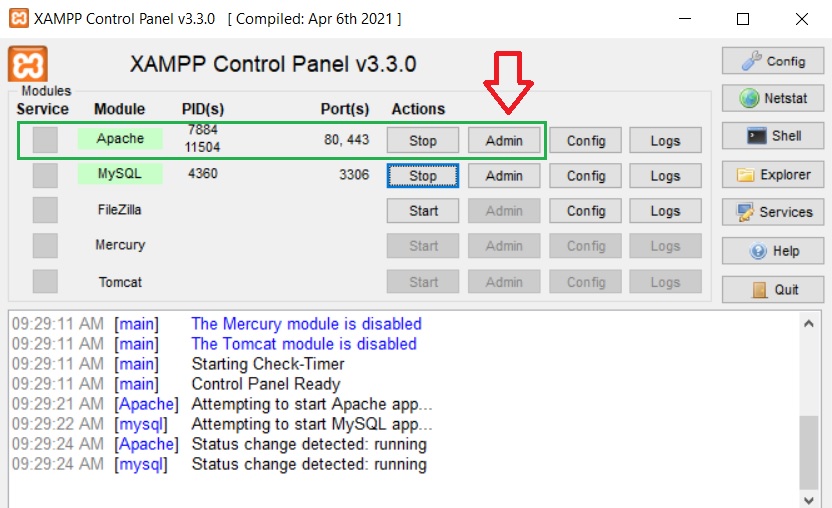
or by going to
http://localhost/phpmyadmin/
Creating a Database to store the Drupal 10 installation data
We are doing , a from scratch installation, So we have to create a database that will be used by the Drupal 10 CMS system to store its data.
Drupal10 can access data from MySQL/MariaDB or Sqlite databases. Here we will be using the MySQL/MariaDB db.
Now we will use phpmyadmin to create a database for the Drupal 10 CMS.
So click on the "Admin" button on XAMPP control panel or got to http://localhost/phpmyadmin/
Now in the below image,
Click "New" and give a name to your database under the "Create database" text box entry ,
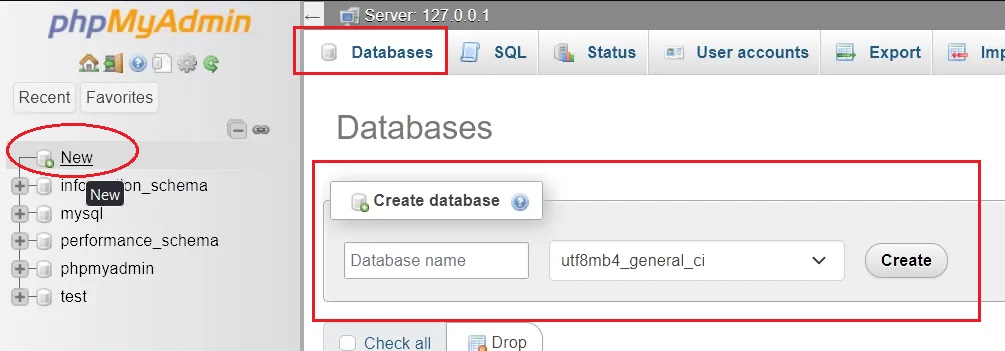
We will name our database as "drupal10_db"

Press "Create" button to create the database.
Once the database "drupal10_db" is created. We need to create a user to access and communicate with it.
We will create a user named "steve" for that purpose.
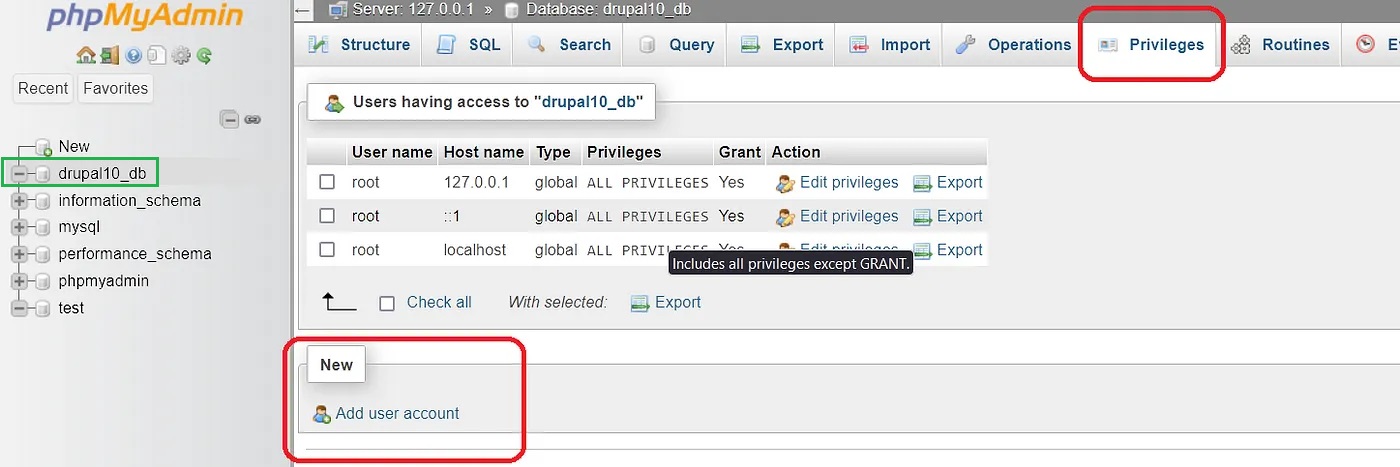
Now click on the "drupal10_db" database on the left column of the phpmyadmin and then click on the "Privileges" tab on top right section.
Click on the "Add User account "under New
In the next window ,Give a name to your user, here "steve".After which select the host name as local .
Use the built in password generator to create a strong password for the user "steve".
Save the password for future use.
We will need to provide this password to connect Drupal 10 to our database "drupal10_db"
Do not grant any privileges to the user here as the privileges granted here are global.
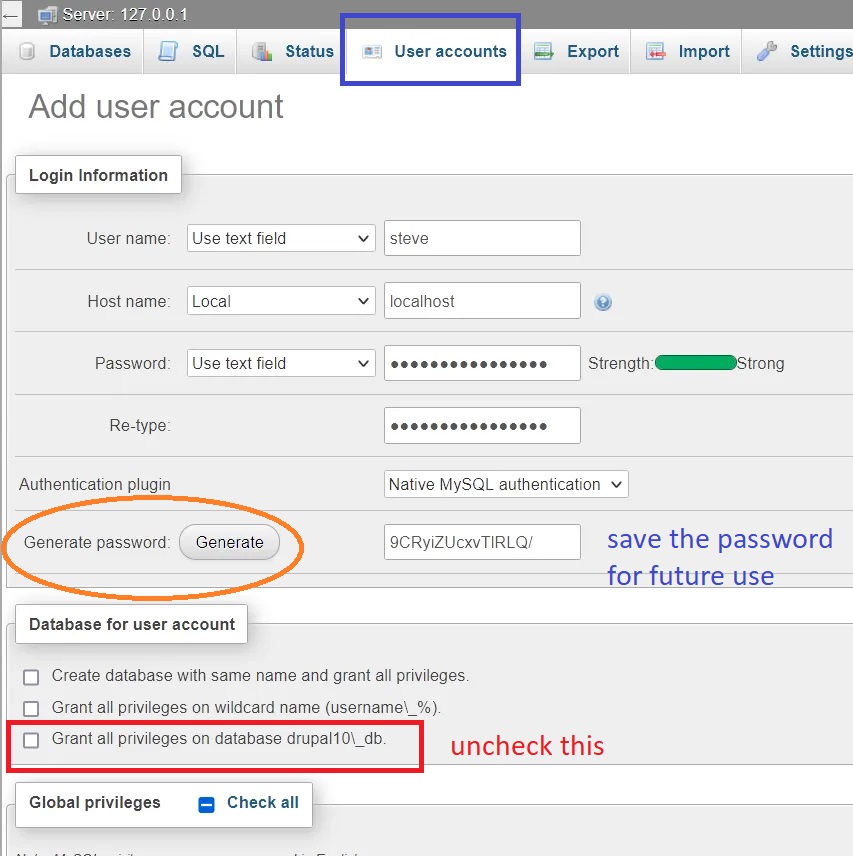
Click on the " Go" button at the bottom
In the next page,
Grant the following privileges' for your database
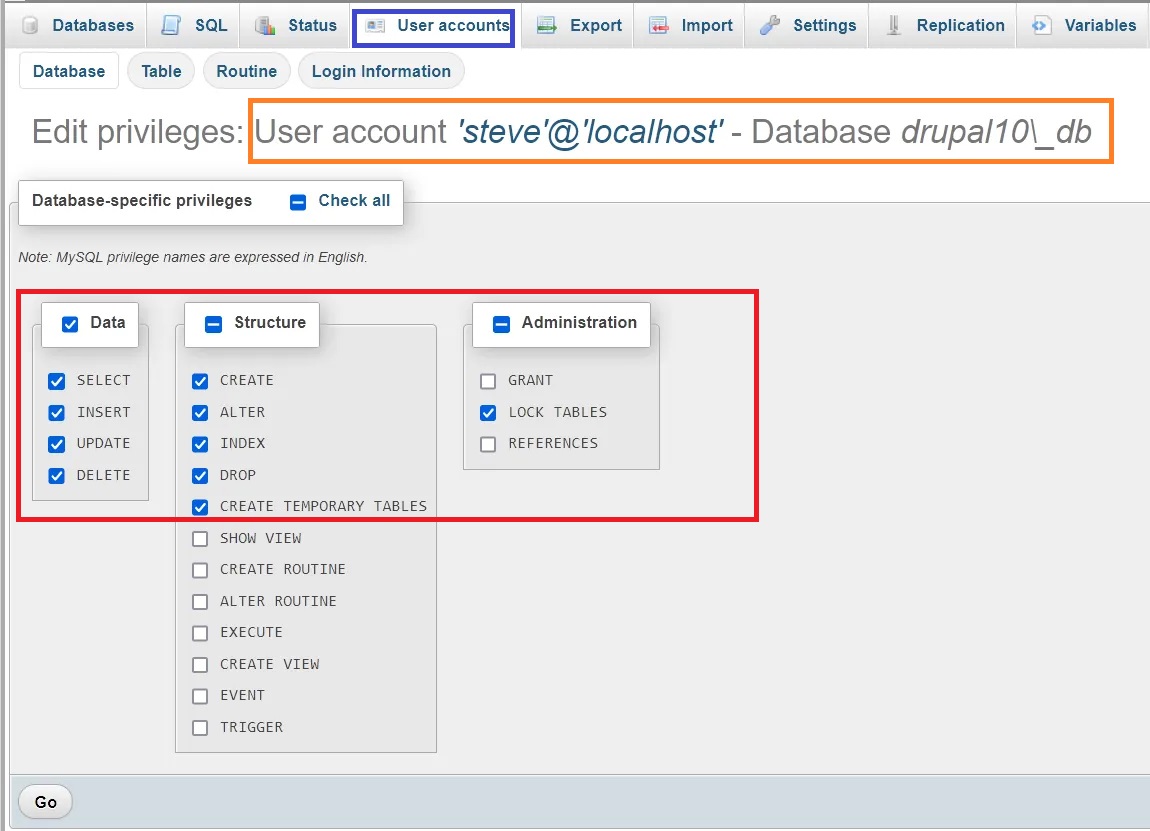
The database part is complete. We will connect this database with Drupal 10 during installation.
Configuring the PHP.ini file
Backup the php.ini file before doing anything.
This step is needed to improve the performance of the installation on the Windows 10 System. Here we will change some of the parameters of the php.ini file.
The file will be located in the folder
C:\xampp\php\php.inior by clicking on the "Config" button of Apache under the XAMPP control panel.

Search and change the following parameters in the php.ini file to the one shown below
max_execution_time = 600
max_input_time = 600
memory_limit = 512M
post_max_size = 64M
upload_max_filesize = 64M
mysql.connect_timeout = 600
Configuring the MySQL my.ini file
Make the following changes to my.ini file located in
C:\xampp\mysql\bin\my.inior by using the XAMPP control panel.
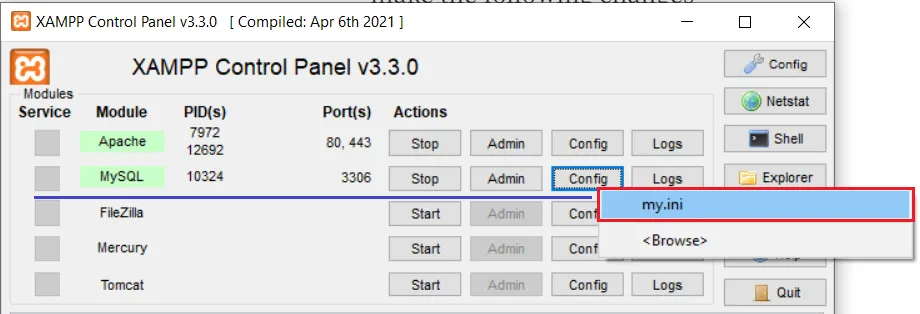
Search and change the following parameters in the my.ini file to the one shown below
max_allowed_packet = 64M
innodb_flush_log_at_trx_commit = 2
Now Restart both Apache and MySQL for the changes to take effect.
Installing Drupal-10 on Windows 10
Download the latest version of Drupal 10 from the website.
Once you have downloaded the the drupal 10 to your PC.
Unzip the folder and place it in the folder htdocs such that the path looks like this.
C:\xampp\htdocs\drupal-10
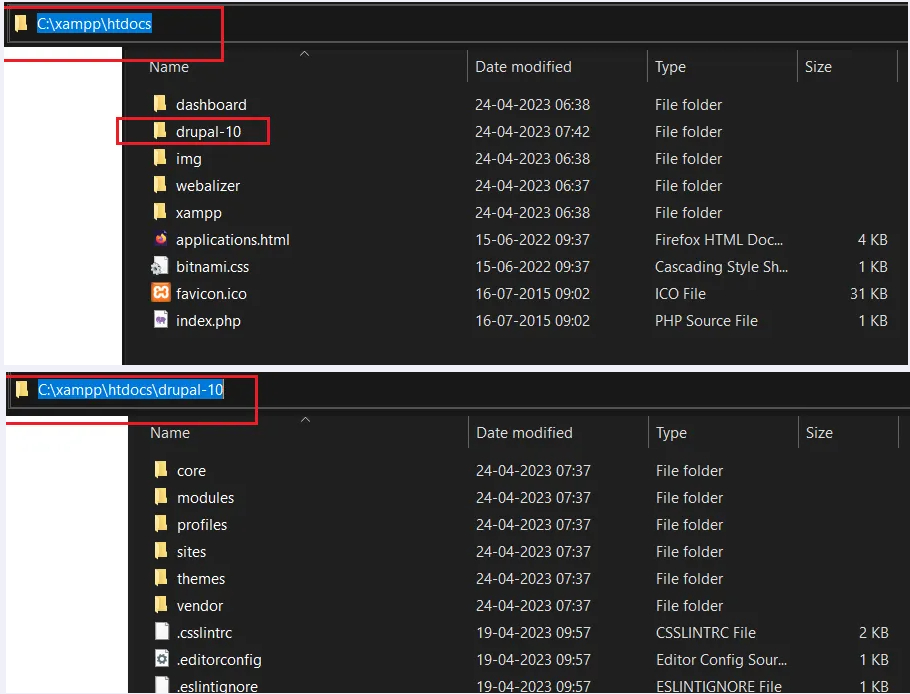
Now go to
http://localhost/drupal-10 using your Browser .
Drupal Installation will start now
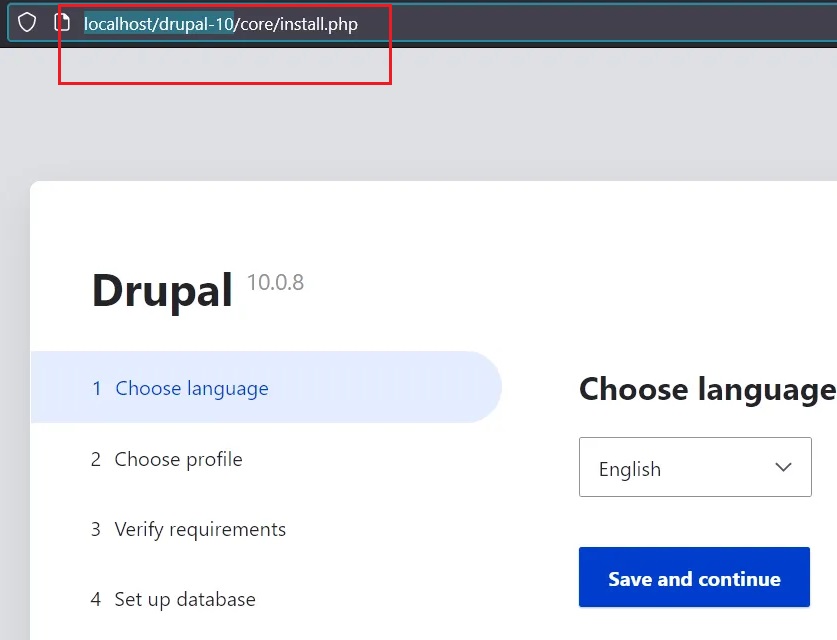
We have renamed the drupal folder to drupal-10.The name has no significance .
you can also just give the name as drupal, so now the path will
C:\xampp\htdocs\drupalTo install in that case we have to go to
http://localhost/drupal
Click Next, Create a Profile
On the Verify requirements page you may encounter ,two issues as shown below.
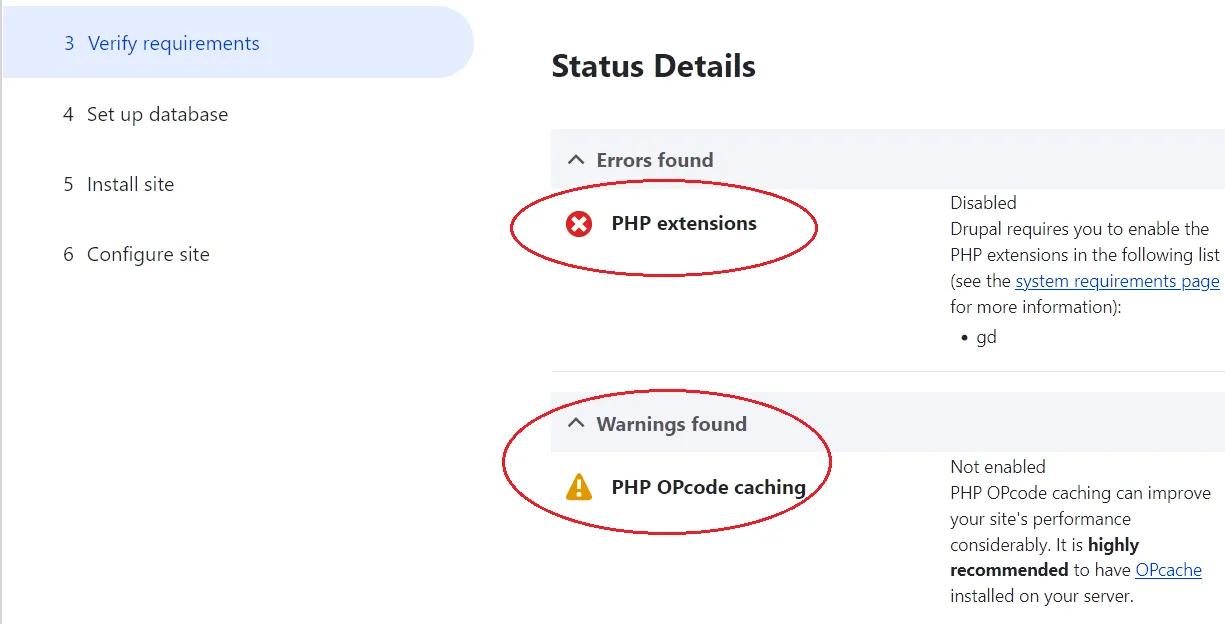
PHP Extensions Error
First one is the error with PHP extensions, Drupal 10 may complain that PHP extensions are not enabled on the Windows 10 system.
The exact error message is
"Drupal requires you to enable the PHP extensions in the following list (see the system requirements page for more information): gd"
To enable the php extensions ,you have to open the php.ini file and search for " extension=gd " without quotes.
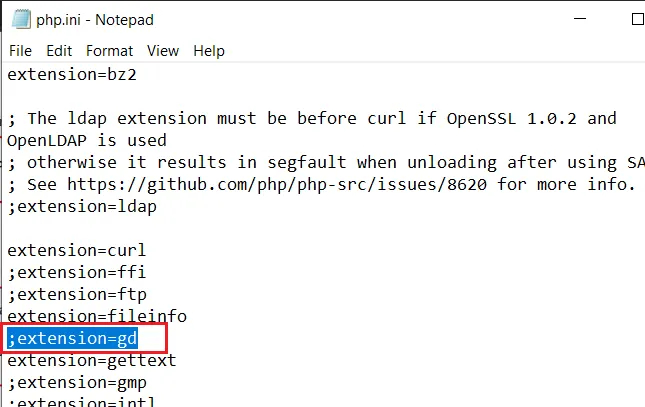
After finding it remove the semicolon to make it active.
Now restart the Apache server
Second thing we have to do is to enable OPcache ,For that add the following line to php.ini and save.
[opcache]
zend_extension=php_opcache.dll
;Determines if Zend OPCache in enabled
opcache.enable=1
Now restart the Apache server
Connecting the Database with the Drupal 10 Installation
Now we will connect the database with the drupal10 installation. Give database name, database username and password to connect. Press Save and continue.
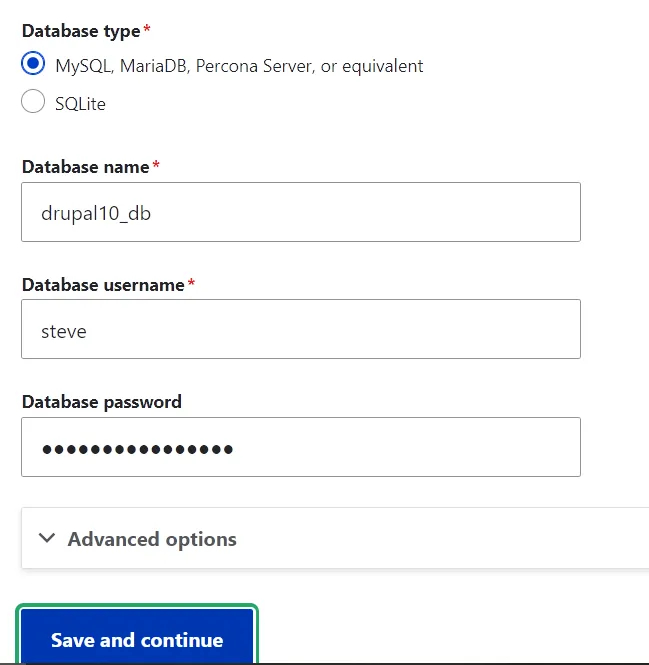
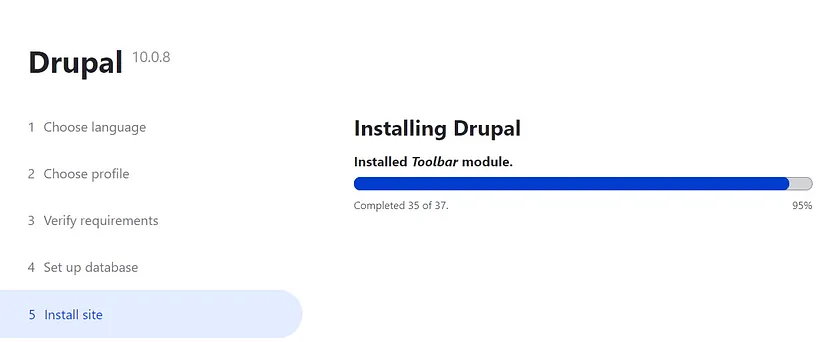
If all the parameters are right the System will install the website on your Windows 10 computer.
- Log in to post comments
