
In this tutorial, we will learn how to build a Cross platform analog meter GUI, resembling the classic gauges that display pressure, temperature, speed, and more, with Python and the ttkbootstrap theme in tkinter.
This type of Meter or Gauge GUI elements are excellent for displaying continuously varying quantities like temperature, pressure on your PC or Linux Single Board Computers like Raspberry PI as apart of Data Acquisition, logging or Control Software.
First thing to do before running the code presented here, is to make sure that ttkbootstrap library is installed on your System. You can use the PIP command for that.
use pip list to check what software are installed on your system .If ttkbootstrap not installed, use the following command to install it
pip install ttkbootstrap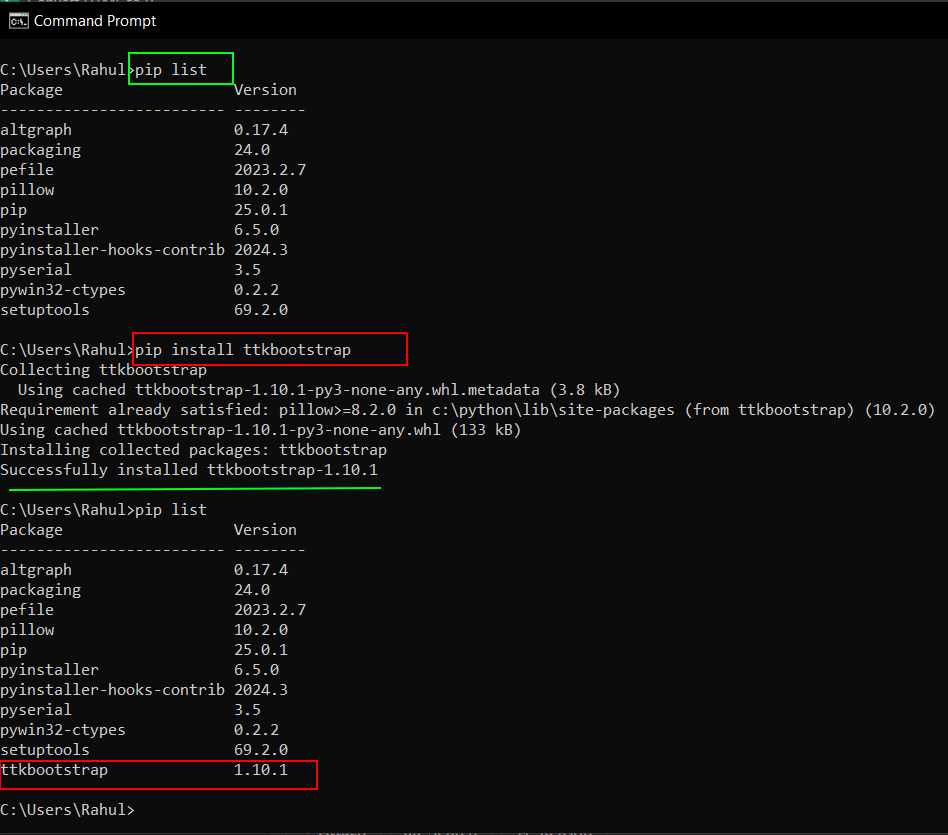
Creating a Simple Meter GUI in tkinter
Now we are going to make a simple meter using the tkinter ttkbootstrap GUI Library. The Code for the meter is shown below and i will explain it line by line later.
#Basic Meter
#As the attribute Image.CUBIC is deprecated (replaced by Image.BICUBIC) and removed in Pillow v10.0.0.
#Either install an older version (v9.5.0) of Pillow module
#or create the attribute explicitly before importing ttkbootstrap module:
from PIL import Image
Image.CUBIC = Image.BICUBIC
import ttkbootstrap as ttkb
from ttkbootstrap.constants import *
root = ttkb.Window()
meter = ttkb.Meter(
metersize = 500, # Size of the meter
padding = 20, # distance between window edges
meterthickness = 10, # thickness of the meter dial
stripethickness = 0, # thickness of discrete stripes,0=Continous
bootstyle = "success", # allows you to apply pre-defined styles like primary,danger,success etc
metertype = "semi", # Semicircle ,"full" =circular
amounttotal = 100, #max value of scale =100
amountused = 50, #current value
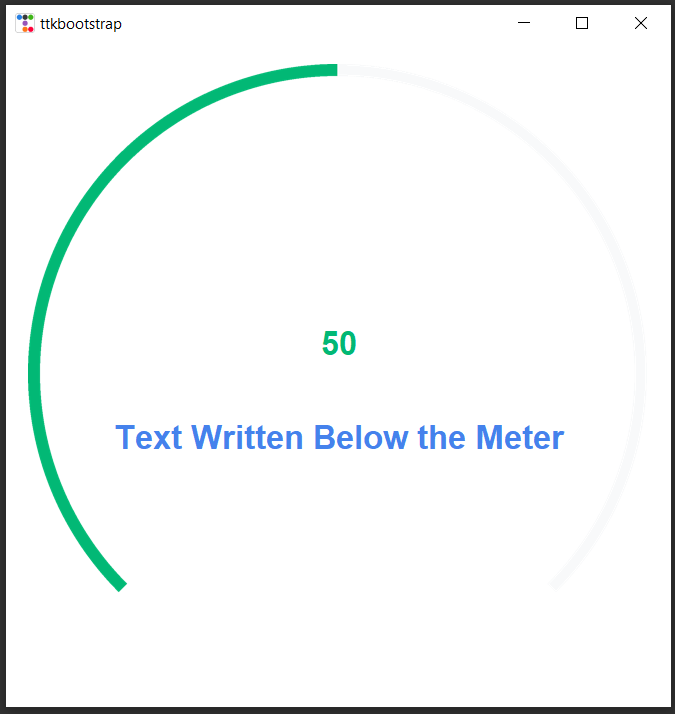
subtext = "Text Written Below the Meter",
subtextstyle = "primary", # allows you to apply pre-defined styles like primary,danger,success etc
subtextfont = "-size 20 -weight bold",
#textleft = "text on the left",
interactive = True, #you can change meter position by mouse
)
meter.pack()
root.mainloop()
On running the code you will get the following output.
Solving module 'PIL.Image' has no attribute 'CUBIC' Error Issue in ttkbootstrap
First thing to do is to import the required libraries and replace Image.CUBIC = Image.BICUBIC
If you don't do this, you will get the following error while running your tkinter ttkbootstrap code.
img.resize((self._metersize, self._metersize), Image.CUBIC)
AttributeError: module 'PIL.Image' has no attribute 'CUBIC'
This is because , the attribute Image.CUBIC is deprecated (replaced by Image.BICUBIC) and removed in Pillow v10.0.0.
To solve the error you can use an older version of the Pillow Module or
Create the attribute explicitly using the statement Image.CUBIC = Image.BICUBIC before importing ttkbootstrap module which is the preferred way of doing it as shown below.
from PIL import Image

Image.CUBIC = Image.BICUBIC  #before importing ttkbootstrap

import ttkbootstrap as ttkb
from ttkbootstrap.constants import *
Explanation of the Meter GUI code
Here i will explain the above code for creating a simple meter GUI in tkinter using the the ttkbootstrap library. Here we will explain the meter creation code only
meter = ttkb.Meter(
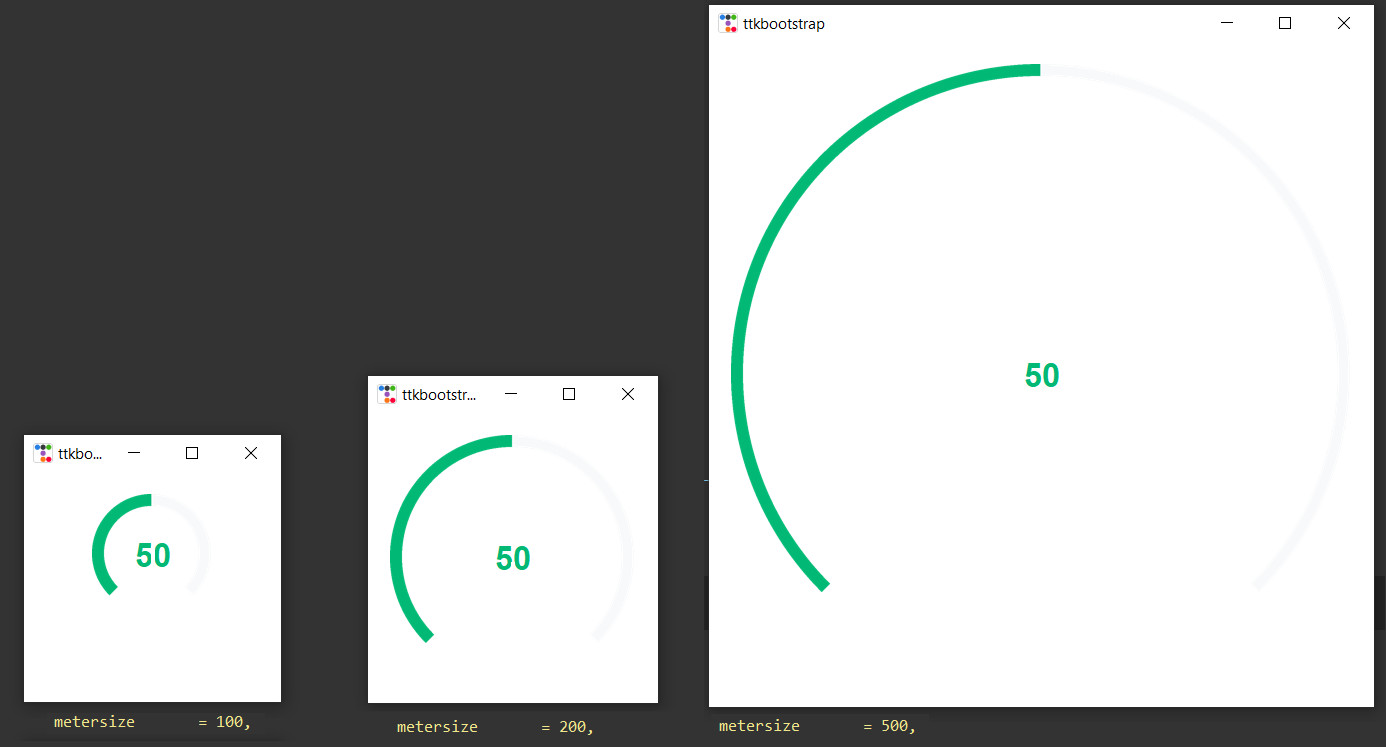
metersize = 500, # Size of the meter
padding = 20, # distance between window edgesmetersize is used to control the size of the meter in pixels .
Here is the size of tkinter meter for varying values of metersize =100,200 and 500.
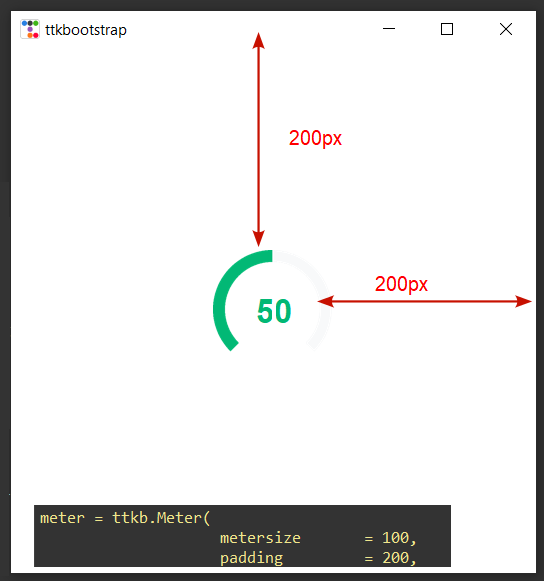
padding is the distance of the meter from the Window edges. Here is padding = 200
meter = ttkb.Meter(
                   meterthickness  = 10,  # thickness of the meter dial
                   stripethickness = 0,   # thickness of discrete stripes,0=Continous
                   ...
                   )
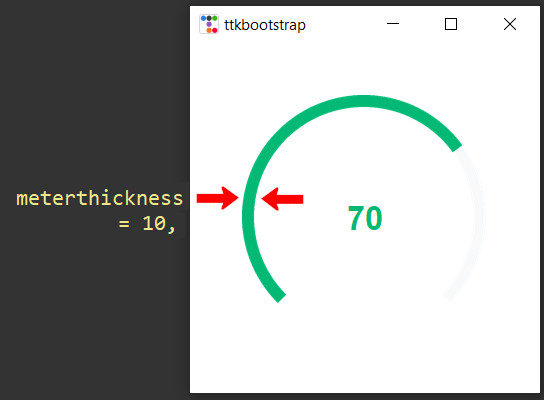
Here meterthickness refers to the thickness of the dial of the meter as shown in the below image.
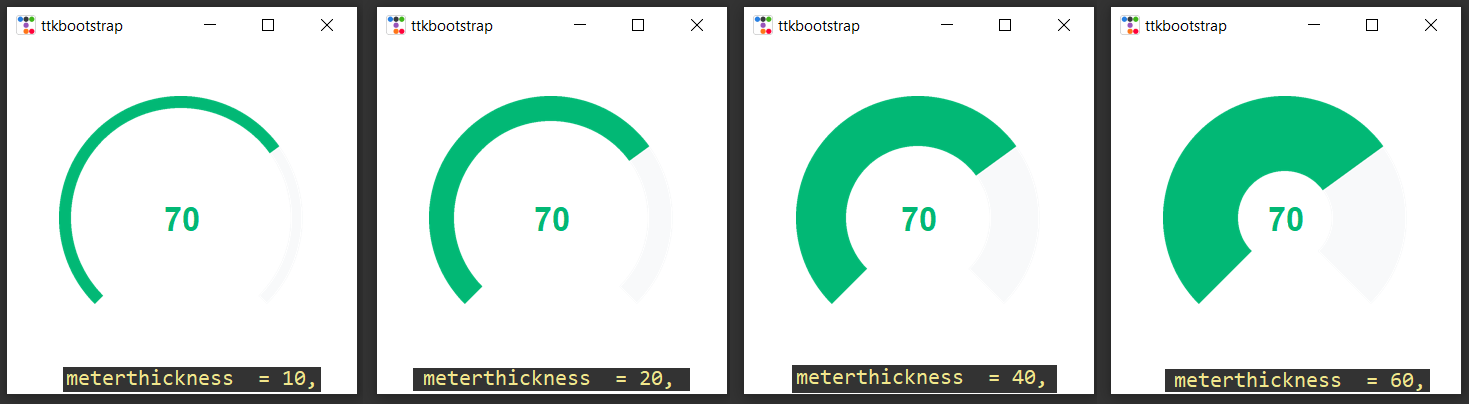
Here is a image of dial thickness for varying values of meterthickness parameter.
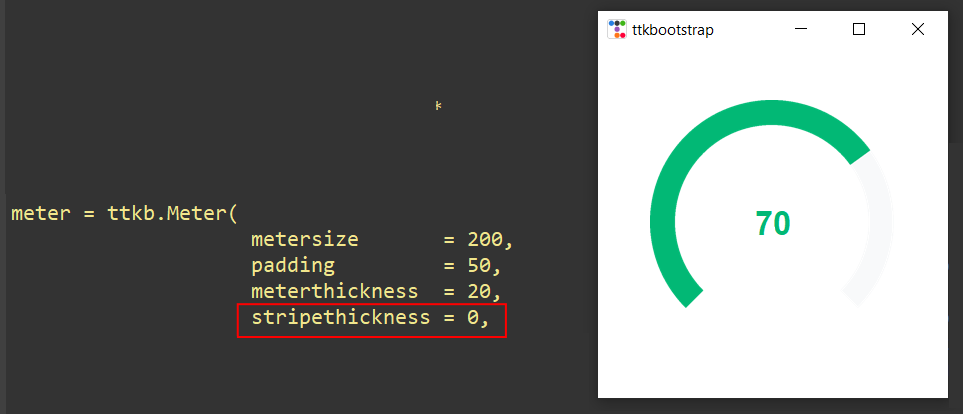
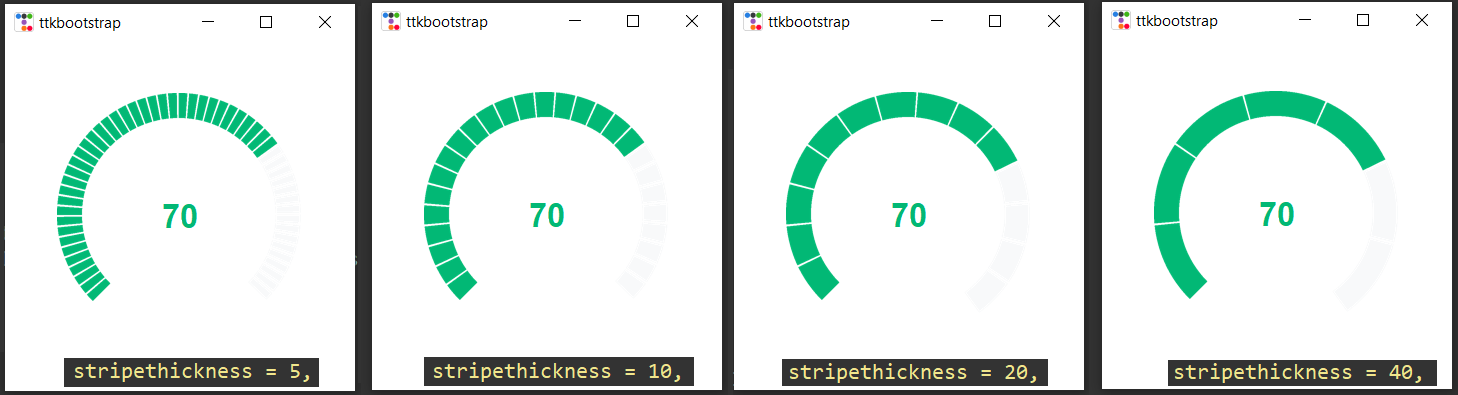
stripethickness parameter in the ttkbootstrap.Meter() refers to the thickness of the stripes that makes the dial.
If the stripethickness = 0 ,there is no separate stripes just a continuous ring as shown below.
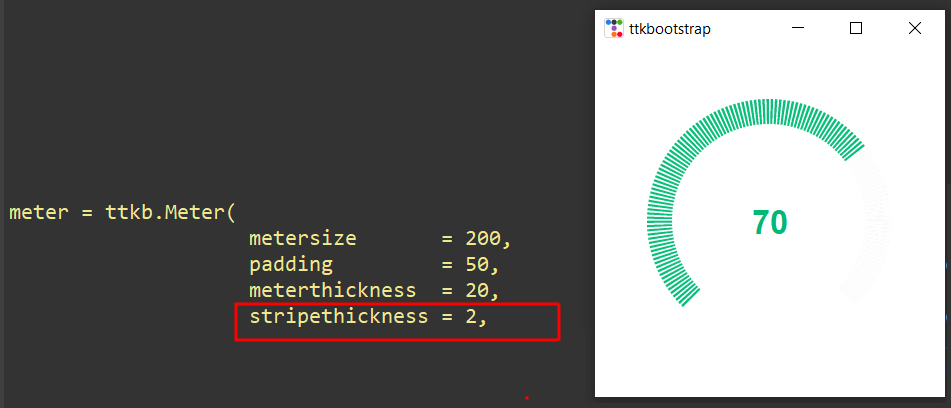
For stripethickness greater than 1 ,you can see discrete strips as shown below. Please note that stripethickness =1 does not work
As you increase the value of the stripethickness, the stripes will get thicker in size and fewer in size as shown below.
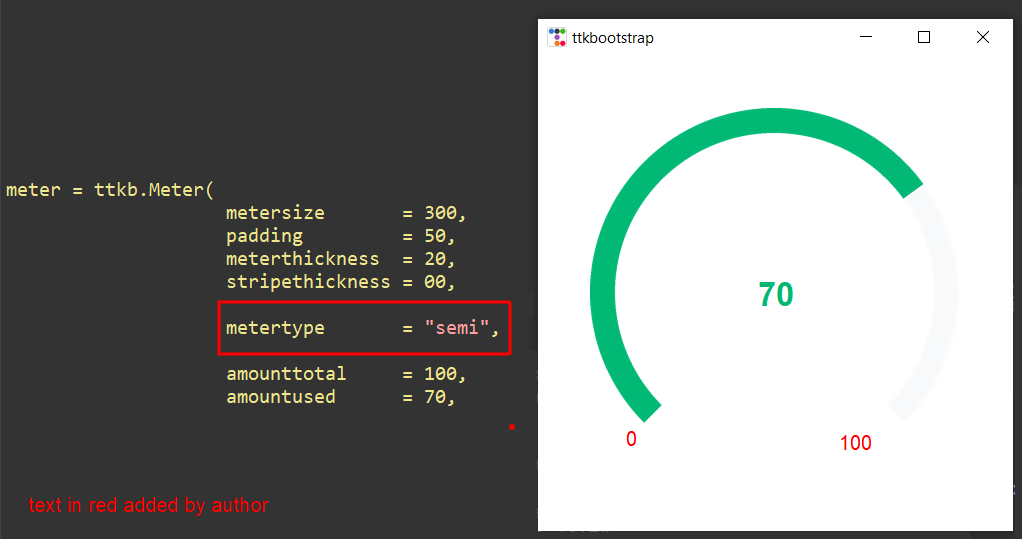
The ttkbootstrap meter widget is available in two types.
- a semi-circle meter (all of the above ones)
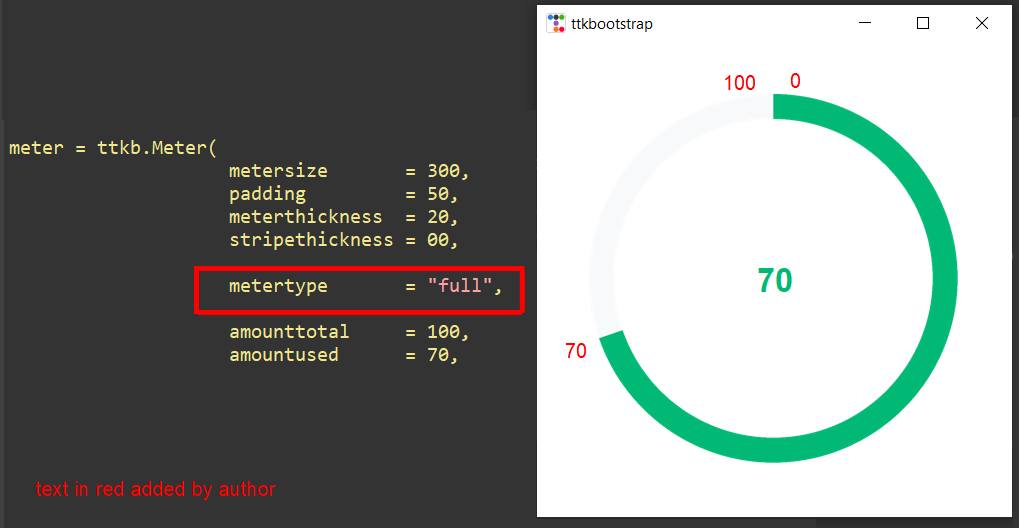
- a full-Circle meter
we can use the metertype parameter in the meter() method to select the type of meter. The 2 options are
- metertype = "semi", # This will create a Semicircle type Meter
- metertype = "full", # This will create a Circle type Meter
Tags
- Log in to post comments