
In this tutorial, we will be building an Opensource Serial Port based Python data logger using tkinter (ttkbootstrap) GUI framework.
The Python Serial datalogger will acquire data from various sensors connected to the Arduino and save the time stamped data to a comma separated variable text file (CSV file) on the connected PC. Here you will also learn to use threading with the tkinter/ttkbootstrap framework to improve the responsiveness of the GUI.
Check our tutorial on serial port programming using Python ,If you are new to the concept of programming serialports.
We use tkinter/ttkbootstrap for building GUI for Python Datalogger, Here is a Quick introduction to GUI programming using tkinter/ttkbootstrap for Python Novices
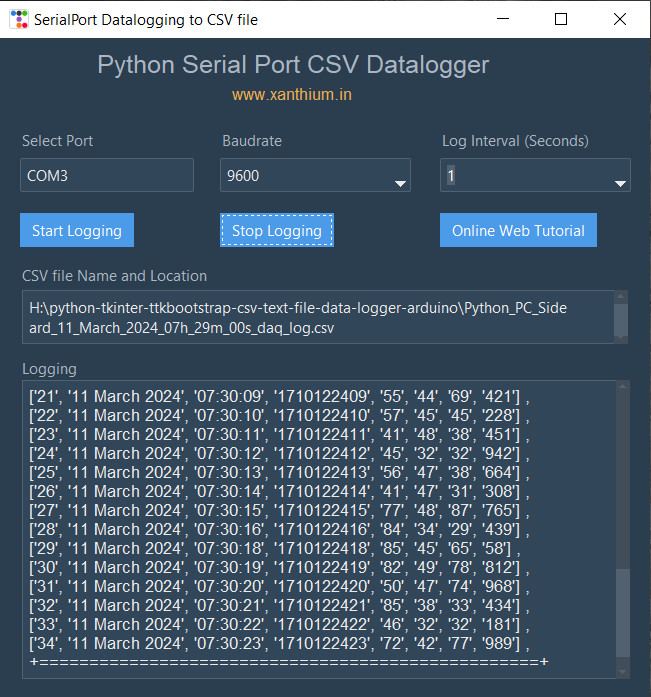
The use of tkinter(ttkbootstrap) for GUI makes the application look professional and intuitive to use compared to a command line version.
The tkinter (ttkbootstrap) based Python Serial CSV Data logger is cross platform and will run on Windows, Linux and Mac OSx systems making it ideal for both hobbyist and professional users.
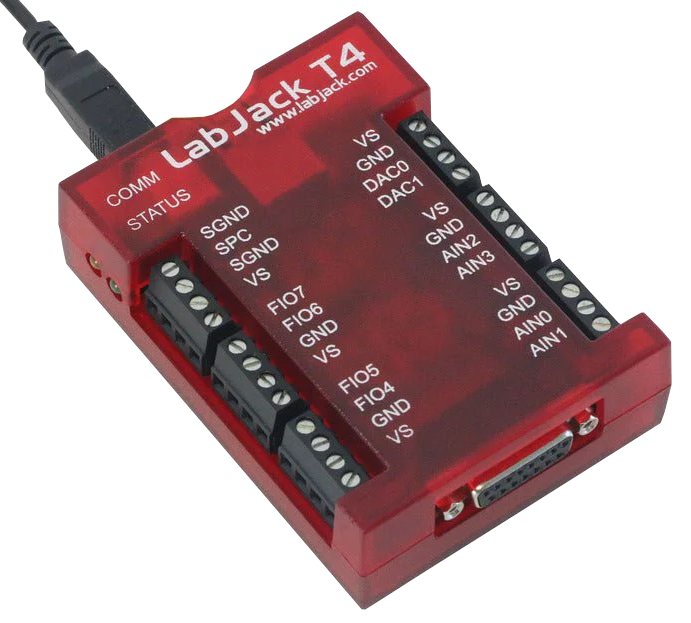
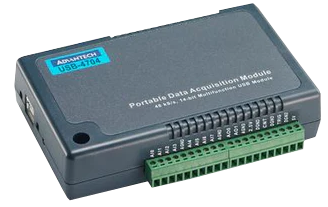
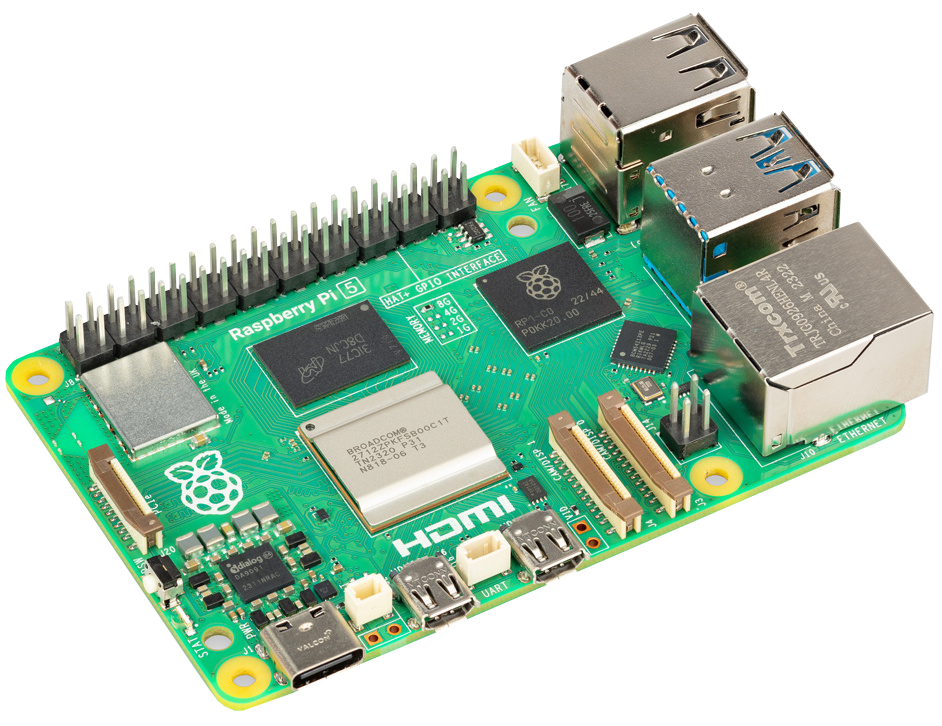
The code can be easily modified to work with a variety of data acquisition systems like Labjack T series or Advantech USB-xxx Series which support USB serial communication protocols or single board Linux computers like Raspberry Pi .
Please note that this code is designed to work with a Arduino Data acquisition system.
Contents
- Intro to Tkinter & ttkbootstrap GUI Library
- Source Codes
- Running the Code
- Install Python
- Installing ttkbootstrap using pip
- Installing pyserial using pip
- Hardware for Data Acquisition and Logging
- Software Architecture of the Data logger
Tkinter and ttkbootstrap GUI Library
Tkinter is a Python binding to the Tk GUI toolkit. It is the standard Python interface to the Tk GUI toolkit and is Python's de facto standard GUI. Tkinter is cross platform and is available on Linux, Microsoft Windows and macOS installs of Python.
One issue with the tkinter GUI library is the dated look of its GUI elements compared to other frameworks.
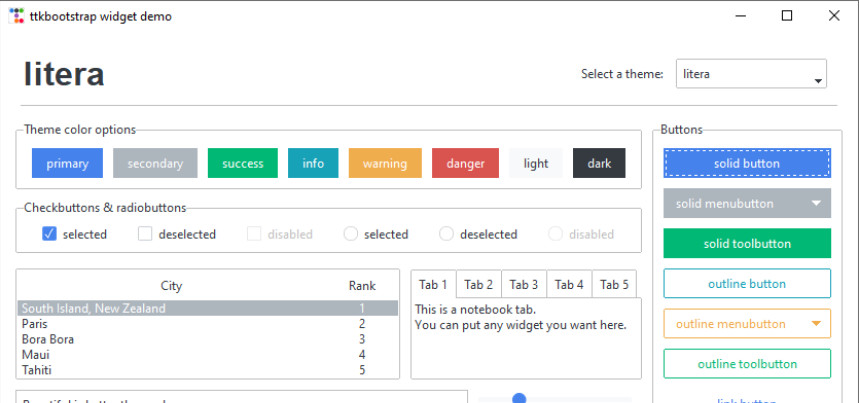
ttkbootstrap is a theme extension for tkinter that enables modern flat style themes inspired by Bootstrap.
ttkbootstrap comes packaged with a collection of beautifully styled light and dark themes, predefined styles for widgets, new gui widgets like Meter, DateEntry, and Floodgauge.You can see the widgets below.
Source Codes

Download Source Code for Python tkinter Serialport CSV datalogger as zip file from here
Browse github repo
Running the Python Data logger Code
To run the code you need to have python interpreter installed. You can use any Python interpreter, here we are using CPython that is available with Standard Python Distribution.
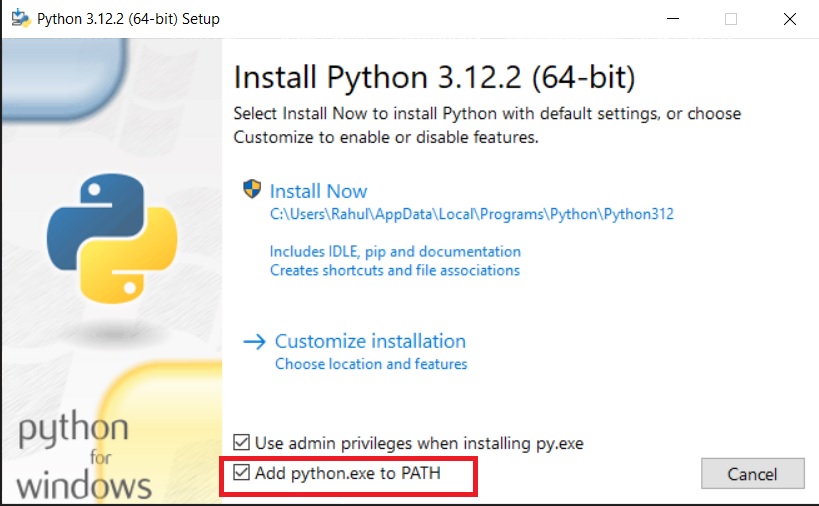
Make sure that you add Python interpretor (python.exe) to the path variable on Windows system.
Our code uses the following modules
Pyserial for communicating with serial port
ttkbootstrap for providing theme extension to tkinter that enables modern flat style themes
Make sure that the above modules are installed before running the code.
You can see the available modules by using the pip command.PIP comes preinstalled with Python interpreter.
pip list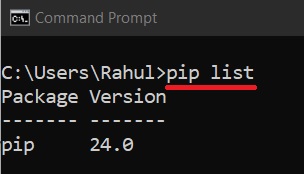
if not installed ,you can use PIP to install the above two libraries.
Installing ttkbootstrap using pip
python -m pip install ttkbootstrapor
pip install ttkbootstrapInstalling Pyserial using pip
python -m pip install pyserialor
pip install pyserial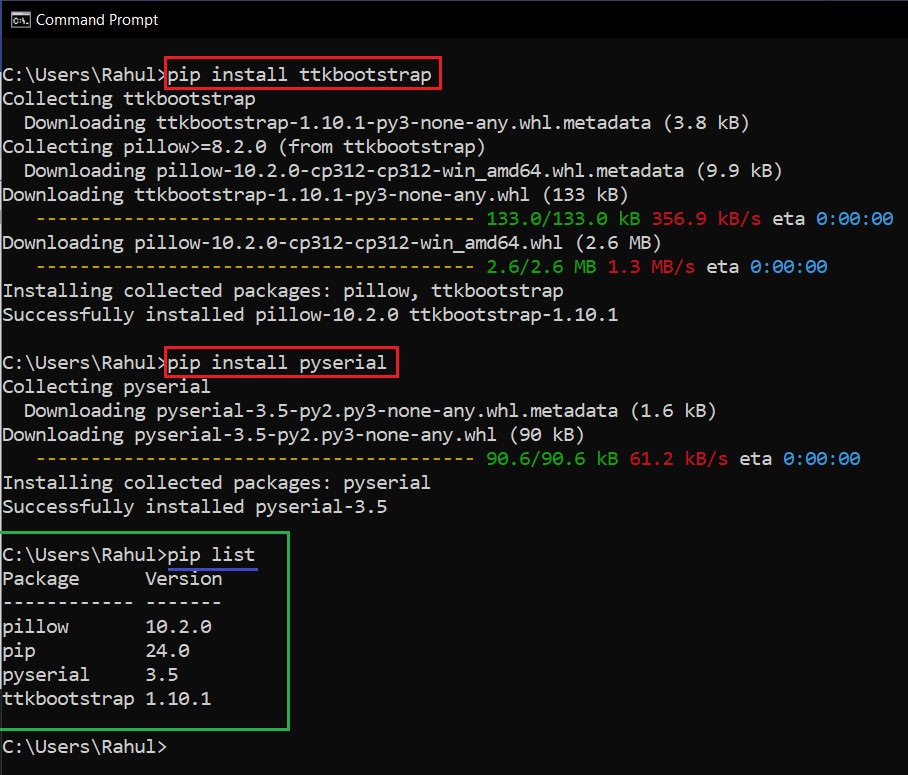
Once installed ,you can run the code using the below command
python multi-thread-serial-logger.py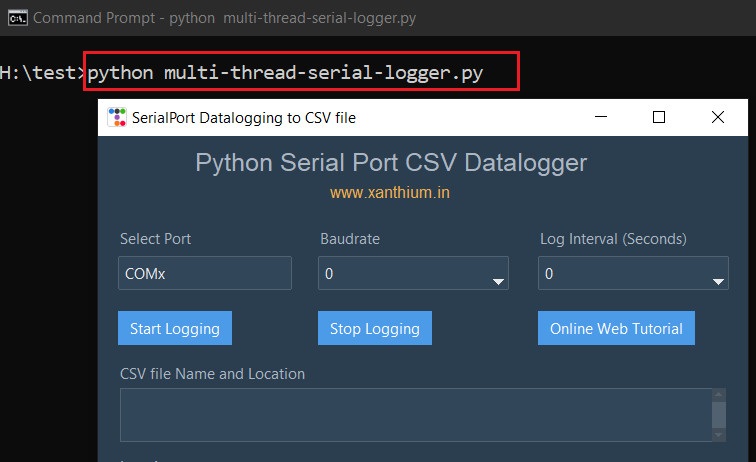
To log data, Download the Arduino Side code into your Arduino.
Check the serial port number of your Arduino on Device Manager and put it in Select Port.
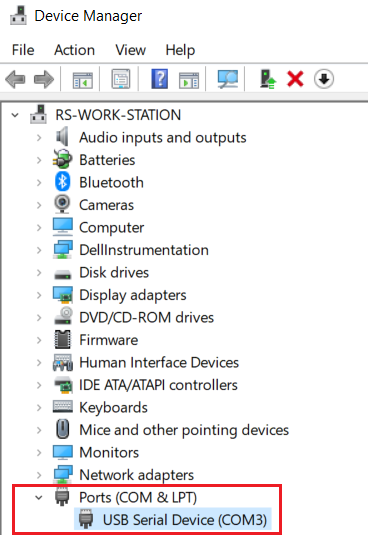
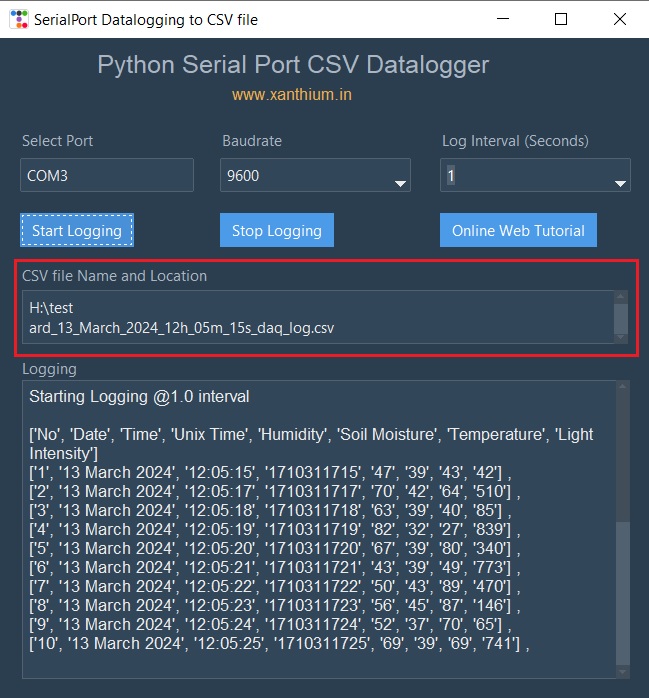
Select the port number, baud rate =9600 and logging interval =1 second. Press "Start Logging" to Start data logging.
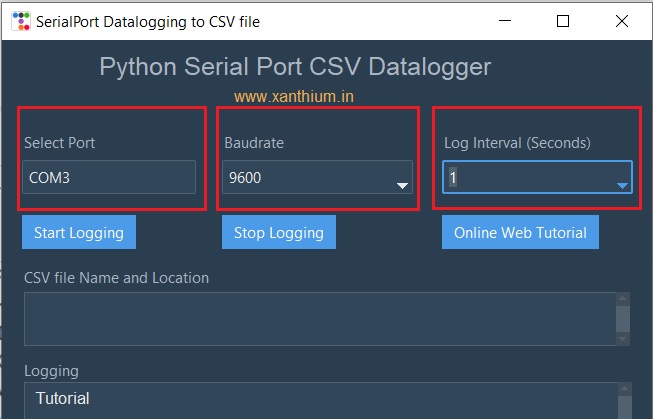
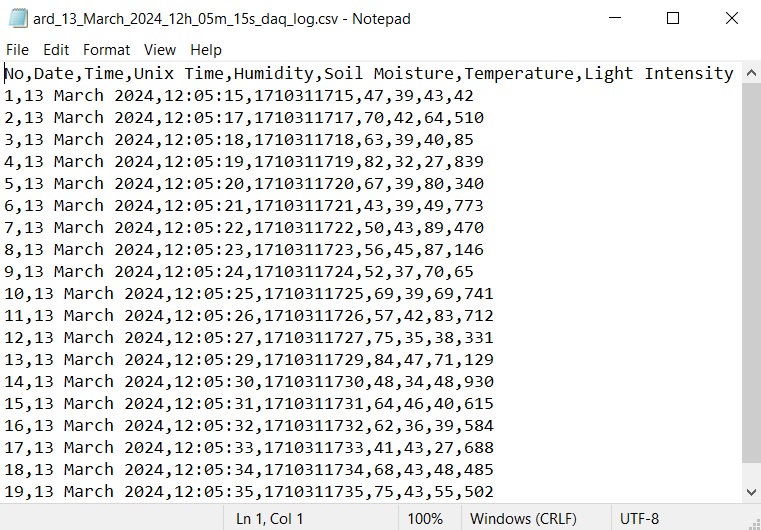
Program will create a CSV (comma-separated values) file and log data coming from the Data Acquisition Device here Arduino to a CSV text File.
Name of the CSV text file created using Current date and time.
Name and location of the CSV text file can be seen on the program as shown below
You can find the CSV datalogger text file in the directory test and open it.
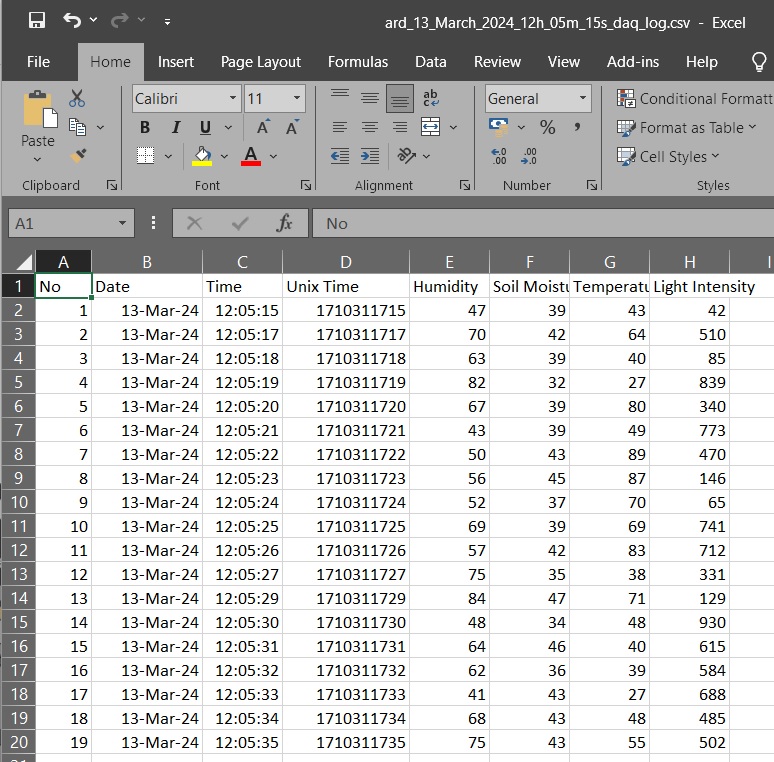
The CSV file can be easily exported to Microsoft Excel
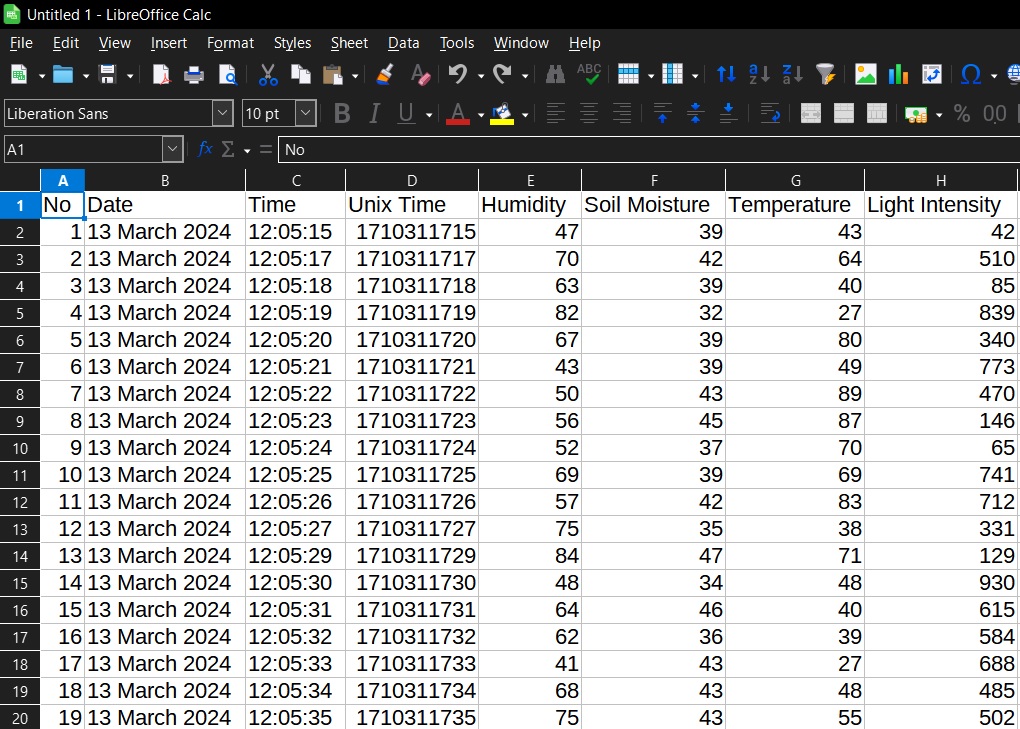
or LibreOffice Calc
Software Architecture of Python Data logger.
The Python Program uses tkinter (ttkbootstrap) to create the window and GUI elements of the Datalogger.
Here we are using a multithreaded design to improve the responsiveness of the tkinter GUI and prevents the freezing of the GUI.
The tkinter GUI will run in the main thread and create a separate thread to run the data acquisition function. This multi threaded approach makes the tkinter GUI more responsive and prevent it from hanging if the data acquisition thread gets blocked or delayed.
The tkinter GUI thread will receive data from data acquisition function thread periodically and update the textbox that displays the received data.
If you are new to python multithreading, do check our video on it.
The main libraries other than ttkbootstrap /tkinter we are using here are
import serial         # for serial communication with Arduino
import threading      # for creating threads
import time           # for delays and getting timestamps for data logging
import csv            # creating CSV files
Below figure shows the software architecture of the Python CSV data logger code.
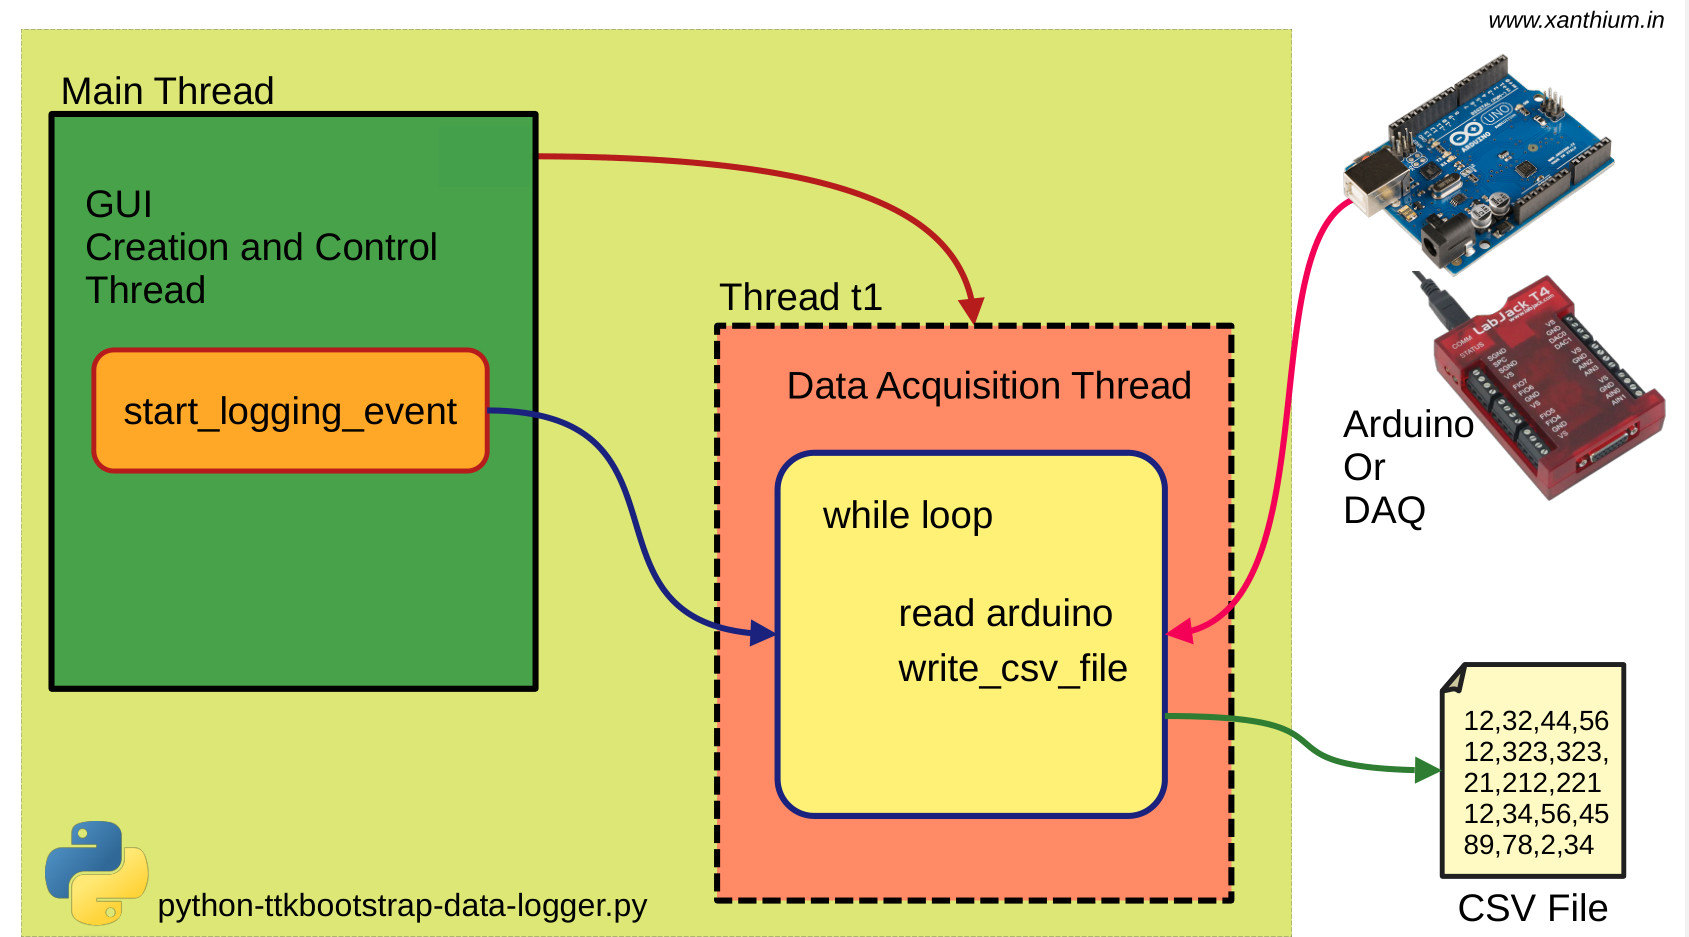
The Python code starts up and creates the GUI elements like Buttons, Dropdown Combo boxes and textbox in the Main Thread.
The Main Thread also creates an threading.Event called start_logging_event which is used to control the loop that does the serial communication and writing CSV values to the text file.
start_logging_event = threading.Event() #Event CreationIf you are new to python threading Events ,do check our video on it.
We will start the thread t1 ,which is the one that will do all the data acquisition and login work inside the tkinter button handler.
When the User clicks the button "Start Logging" (start_log_btn) ,
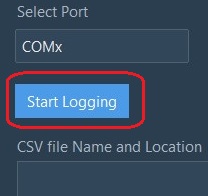
the button handler function def start_log_btn_handler(): will be called and the thread t1 is created and started.
#Start Logging (start_log_btn) ,the button handler function

def start_log_btn_handler():

   start_logging_event.set()
   serialport_name = port_no_entry.get()

   t1 = threading.Thread(target = acquire_arduino_data,args=(serialport_name,baud_rate,log_int))
   t1.start()
start_logging_event.set() when the thread is created. Thread t1 starts and runs as shown below.
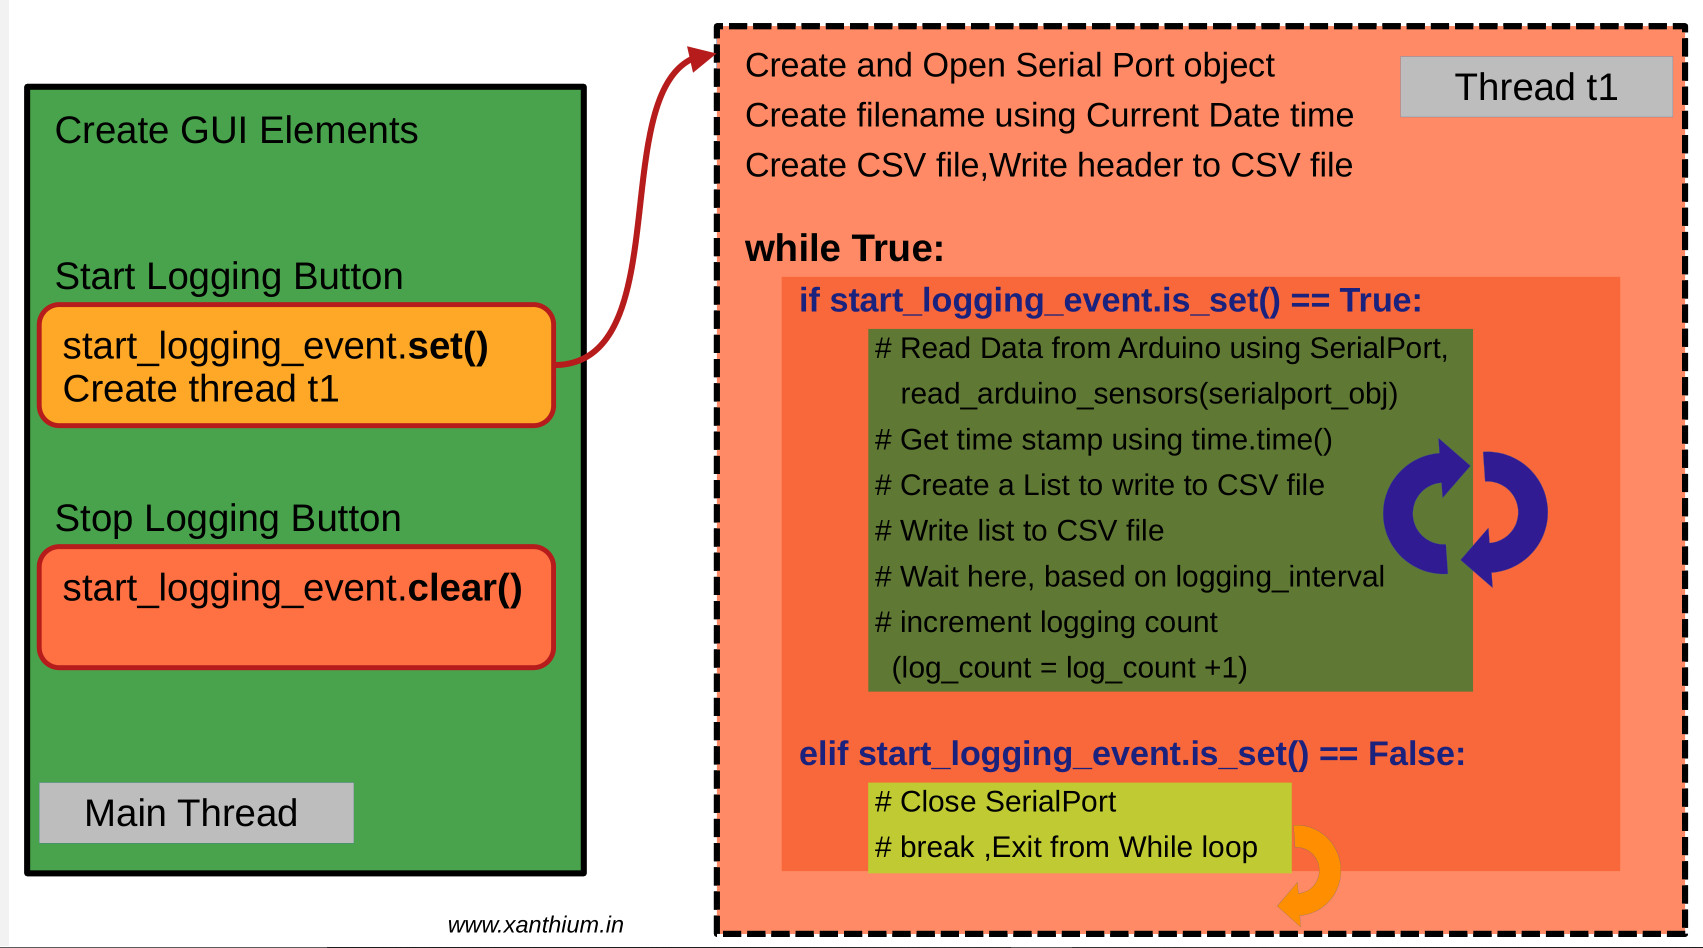
Inside the thread t1,
we run the function acquire_arduino_data(serialport_name,baud_rate,logging_interval) which will open the connection to serial port using the port number and baud rate inside a try catch statement.
Check our tutorial on serial port programming using Python ,If you are new to the concept
#Create the Serial port object
   try:
       serialport_obj = serial.Serial(serialport_name,baud_rate)       #open the serial port
       time.sleep(2)                                                   #Some time for Arduino board to reset
       text_log.insert(END,f'Arduino Ready Now ,\n\n')

   except serial.SerialException as var :                              #In case of error
      text_log.insert(END,f'{var} ,\n')
if there is an error in opening the port. The error message is sent to the Textbox( text_log) using the following code.
text_log.insert(END,f'{var} ,\n')We then create a file name using current date and time with file extension .csv
by calling the function create_filename_current_date_time().
The file name will look something like shown below.
Eg ard_11_March_2024_08h_47m_58s_daq_log.csvInside the function.
#create a file name using current date and time with file extension .csv in Python

def create_filename_current_date_time():
   # Generate file name using Current Date and Time
   current_local_time = time.localtime() #Get Current date time

   filename           = time.strftime("%d_%B_%Y_%Hh_%Mm_%Ss",current_local_time) # 24hour clock format
   filename           = 'ard_'+ filename + '_daq_log.csv'


   return filename
After creating the filename ,we create a list (csv_header) containing the CSV headers which we want to write into the CSV file .
Here we are using the csv module from the standard library to write the header.
#create CSV header to write once into the created file
csv_header =['No','Date','Time','Unix Time','Humidity','Soil Moisture','Temperature','Light Intensity']

# write csv header into the createdfile
with open(log_file_name,'a',newline ='') as File_obj:
       csvwriter_obj = csv.writer(File_obj, delimiter = csv_delimiter)
       csvwriter_obj.writerow(csv_header)
The default delimiter is comma, you can change the delimiter by changing the global variable csv_delimiter
csvwriter_obj = csv.writer(File_obj, delimiter = csv_delimiter)We then use an infinite loop to constantly read data from the Arduino. start_logging_event is used as a sentry to control the data acquisition process as shown below.
 while True:

       if start_logging_event.is_set() == True:

           # Read Data from Arduino using SerialPort,read_arduino_sensors(serialport_obj)
           # Wait here, based on logging_interval
           #increment logging count (log_count = log_count +1)

       elif start_logging_event.is_set() == False:

           # Close SerialPort
           # break ,Exit from While loop
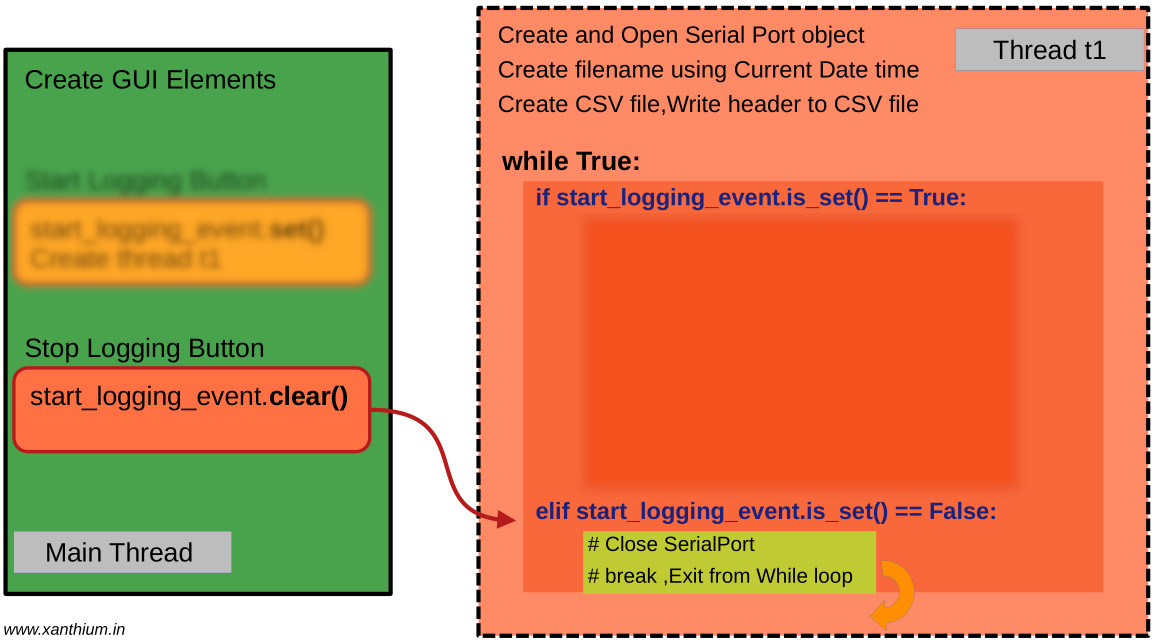
start_logging_event is cleared when you press the "Stop Logging Button" (below) and the program exits from the while loop (above )
def stop_log_btn_handler():
   start_logging_event.clear()
Data acquisition from the Arduino is done by the read_arduino_sensors(serialport_obj) function.
It sends a character of type byte to query the necessary sensor and the Arduino responds by sending back the requested value.
serialport_obj.write(b'@')            #Send @ to Arduino  to get humidity value
time.sleep(polling_interval)          #wait some time,to give arduino to respond
humidity_value = serialport_obj.readline()
All the values are logged into a List and returned.
  return_list[0] = humidity_value.decode() #.decode is used to remove the byte 'b',convert to string
  return_list[1] = soil_value.decode()
  return_list[2] = temp_value.decode()
  return_list[3] = light_value.decode()

  return return_list
Hardware for Data Acquisition and Logging
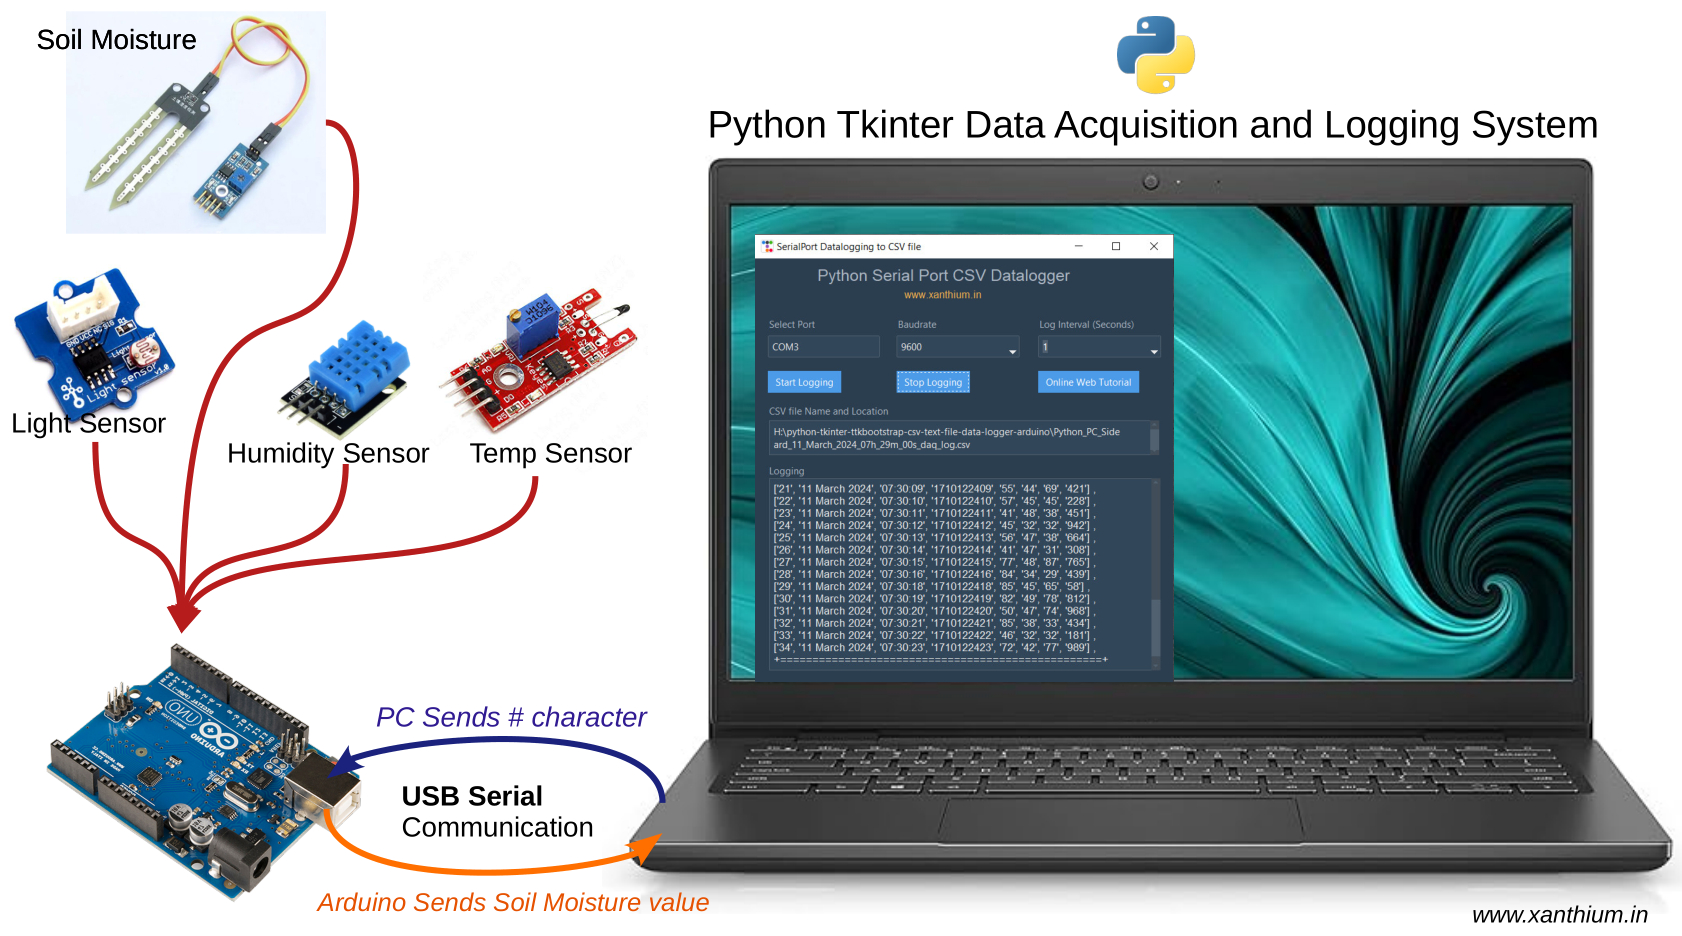
You can use the following hardware setup to measure data from various sensors like Soil Moisture Sensors, Humidity sensors, Temperature Sensors using Arduino and Python for data logging to CSV file.
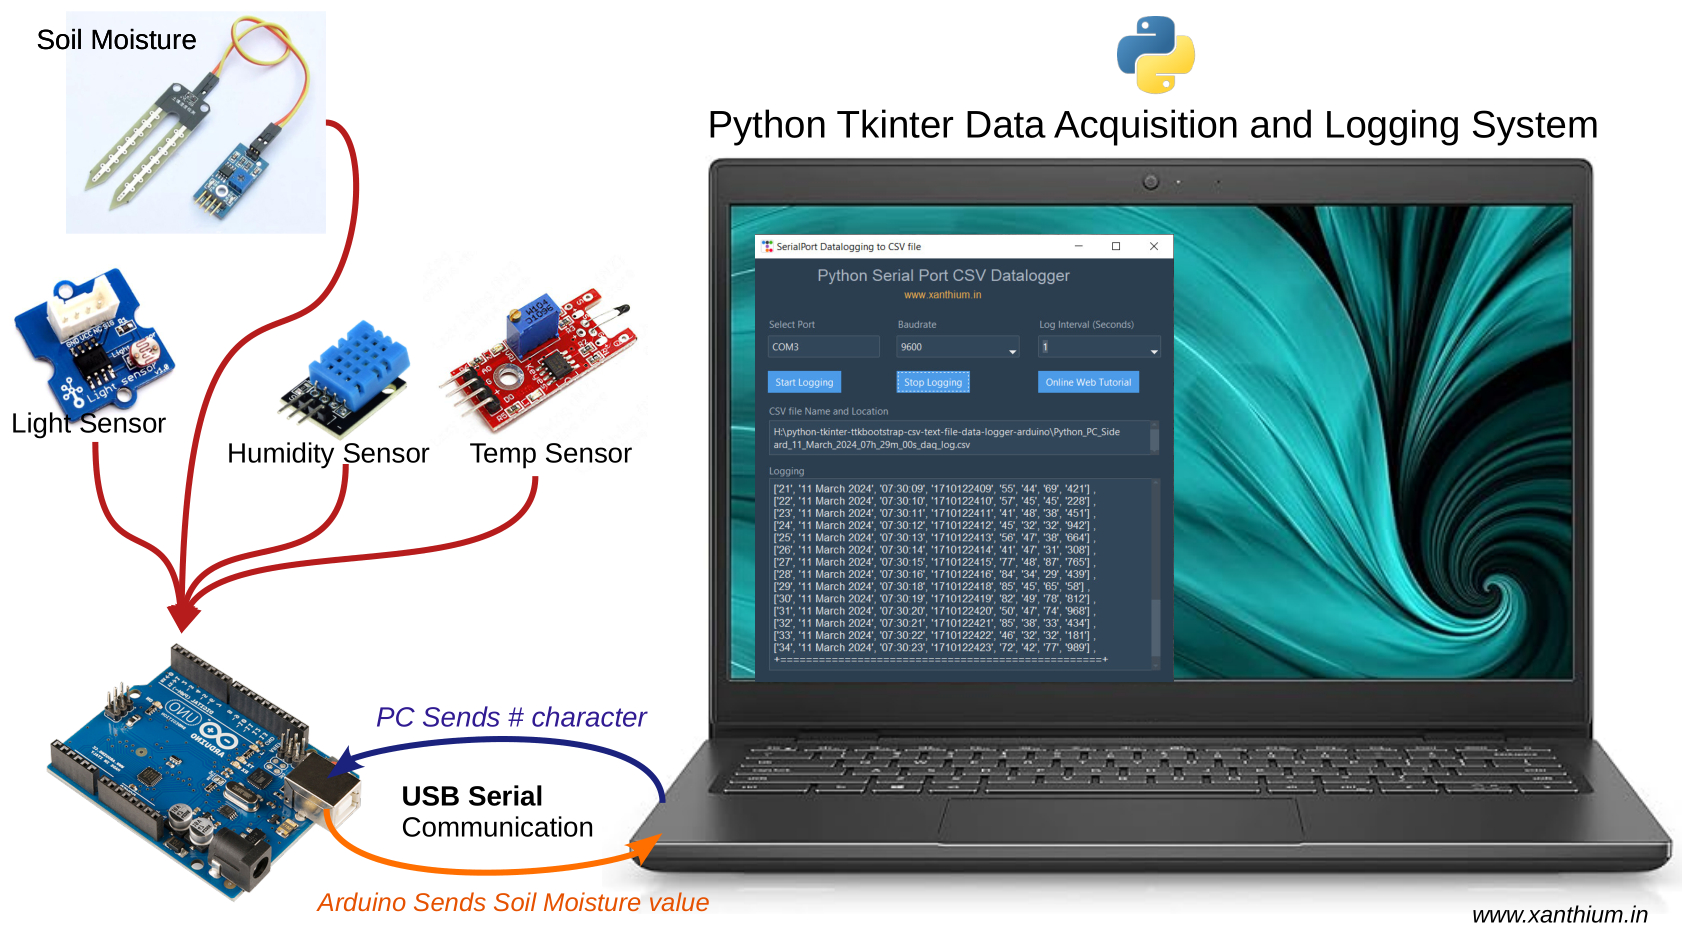
Here PC sends characters like @,#,$and % which are received by Arduino and the appropriate sensor values are returned.
- Send @ to Arduino to get humidity value
- Send # to Arduino to get Soil Moisture value
- Send $ to Arduino to get Temperature value
- Send & to Arduino to get Light Intensity value
Arduino side code is designed to interface with any generic sensor. Here we are concentrating on the PC side Code,So we will be using dummy values to simulate sensor readings.
The code for the Arduino is shown below.
if (Serial.available() > 0) //Wait for data reception
  {
    ReceivedByte = Serial.read();//Read data from Arduino Serial UART buffer

    switch(ReceivedByte)
    {
     case '@':
               TransmitHumidityValue(); # implement the code specific to your sensor inside this function
               break;

     case '$':

               Transmit_Temperature_Value();# implement the code specific to your sensor inside this function
               break;
     case '#':
               TransmitSoilMoistureValue();# implement the code specific to your sensor inside this function
               break;
     case '&':
               TransmitLightIntensityValue();# implement the code specific to your sensor inside this function
               break;

     default:  Serial.println("Default Value");

    }//end of switch()
  }//end of if
Interested in turning the python .py file to windows executable .Check the tutorial below
- Log in to post comments
